Importing and exporting multilingual content into WordPress can seem complex, but the process becomes straightforward with WP Ultimate CSV Importer Pro and Polylang Pro. This guide will walk you through the steps to import and export various translations for posts, pages, categories, and WooCommerce content.
Good to know:
- Are you a Polylang Pro user? We have a promo code for WP Ultimate CSV Importer Pro! Write to us, and we’ll share it with you.
- WP Ultimate CSV Importer Pro helps you migrate content to and from your WordPress site. It meets all your import/export needs, supporting every post type (posts, products, taxonomies, and users).
- Polylang Pro allows you to import or export multilingual content into WordPress using the same logic as WP Ultimate CSV Importer Pro. It avoids duplicating content and smartly sorts the content by language.
- We recommend using WP Ultimate CSV Importer Pro instead of WP All Import because no compatibility has been developed between WP All Import and Polylang.
Technical setup:
- WP Ultimate CSV Importer Pro
- Polylang Pro
- WooCommerce and Polylang for WooCommerce (if you need to import/export WooCommerce content).
Importing Multilingual Posts with WP Ultimate CSV Importer Pro
Polylang Pro and WP Ultimate CSV Importer Pro allow you to upload content in multiple languages and link translations effortlessly. This ensures that your posts are correctly organized for a multilingual audience. You can easily import and export translations into your WordPress site with a well-prepared CSV file and a few configuration steps.
Step 1: Prepare the Structure of Your Import File
Follow our guidelines to structure your file and ensure a successful import process. We have set up a test site for this tutorial in English (the primary language) and French (the secondary language).
File format
- Your import file should be in CSV, XML, or Excel format.
- Each row represents a single post or page.
- Use columns to specify different attributes of the content, including language-specific details.
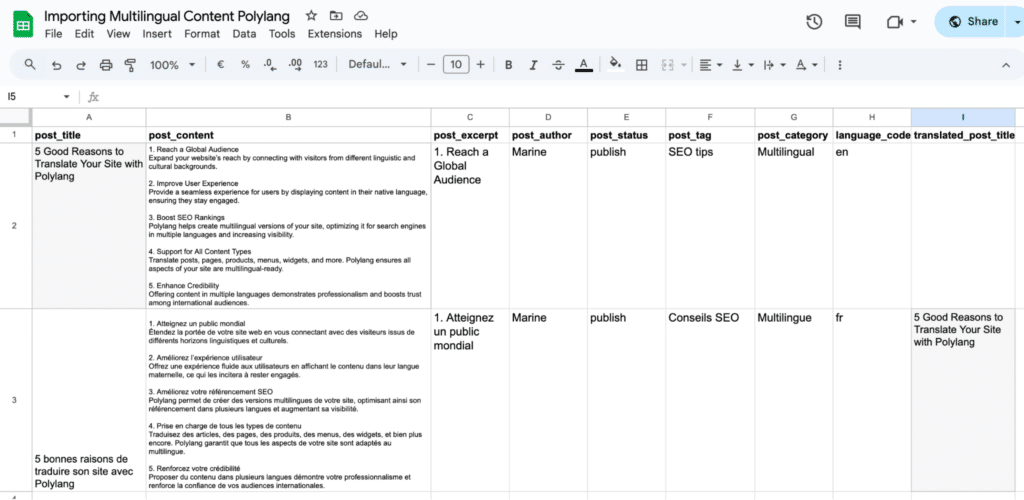
You need to include the following important columns before you start the import into WordPress:
- Post_title column: includes the titles of the posts you want to import. Each row should correspond to the post title for that specific content.
- Post_content column: you can insert the body text of your posts or pages.
- The Language_code column defines the language of each post. Use the language codes already configured in Polylang (e.g., “fr” for French, “en” for English).
- Translation_post_title column: it helps WP Ultimate CSV Importer Pro to link the translated content to its original version.
If it’s for content in the original language (en), leave this column empty:
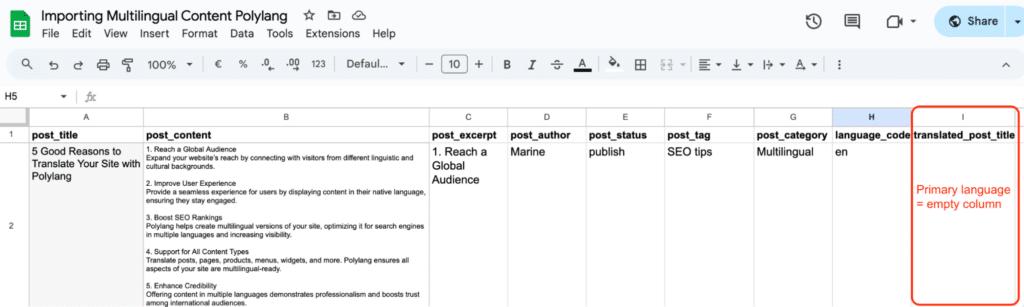
If it’s for translated post content (fr), put the title of the matching original post in this column. This will “tell” Polylang to associate both posts together.
Other columns
It’s up to you to add more columns if you want to import more multilingual elements. For example, if you’re going to have a different featured image in English and in French, then you can add the “Featured_image” column.
| ⚠️ Important note: Do not remove any columns from your import file. If a column is missing or its value is left blank, the existing data for that field may be deleted from the matching post. |
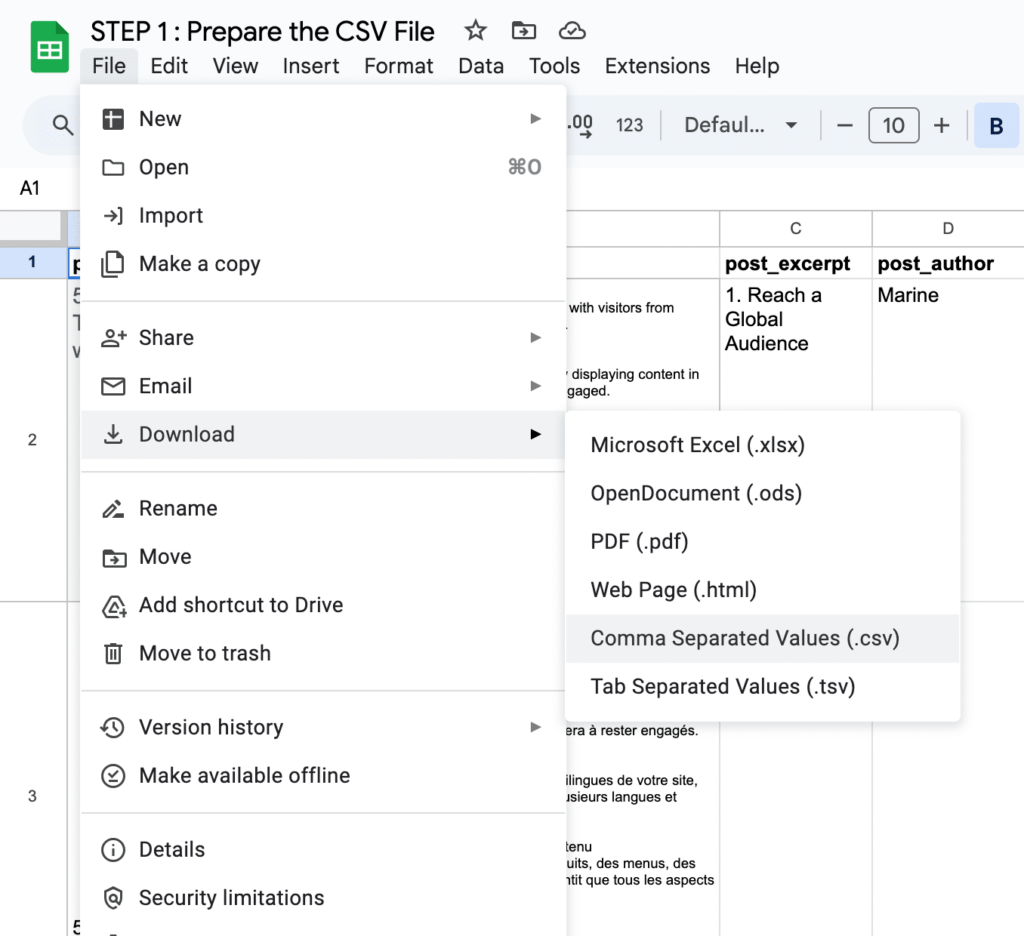
Step 2: Export your File in .CSV XML, or Excel Format
Exporting your file in CSV, XML, or Excel format is essential to import your content with WP Ultimate CSV Importer Pro.
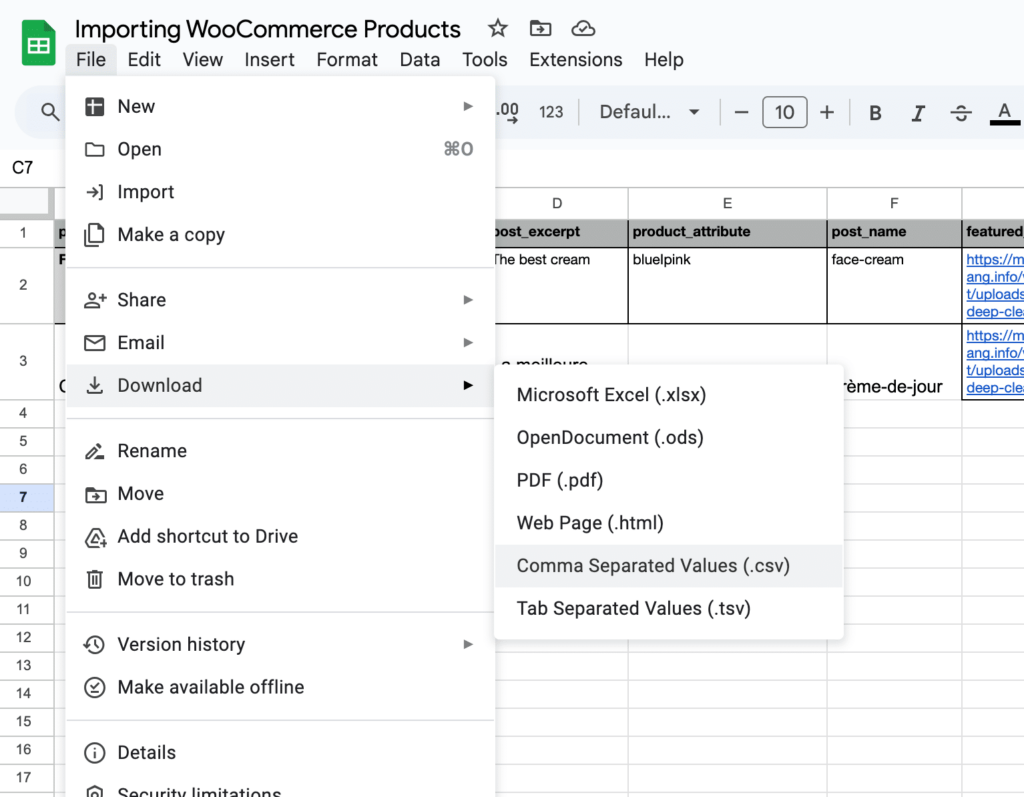
Go to File > Download > Comma Separated Value (.csv)
Exporting your spreadsheet to the correct format
Step 3: Import the .CSV File to WordPress
Head to your WordPress admin, go to Ultimate CSV Importer PRO > Import/Update > Browse, and select the file you just exported to .CSV.
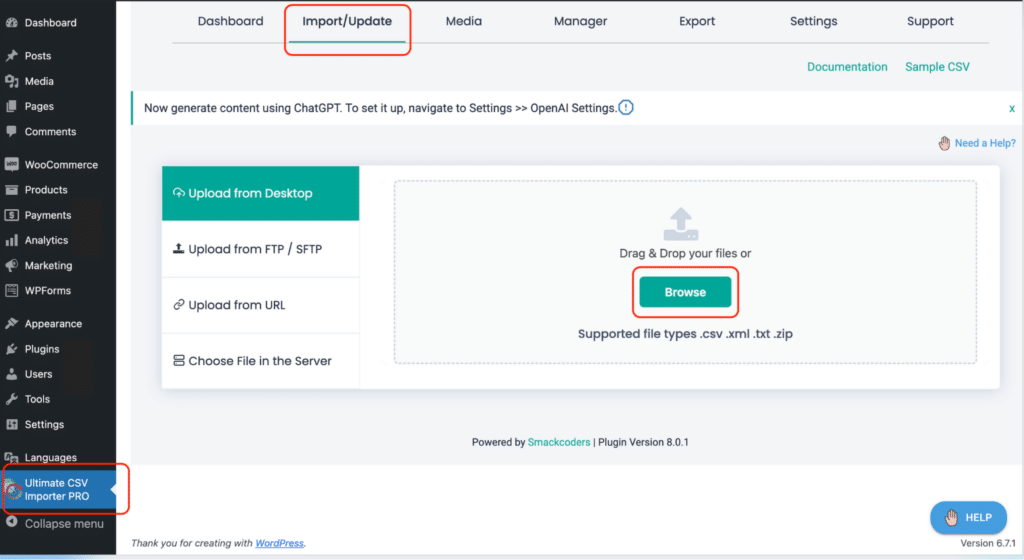
Specify if it’s a fresh import (new content) or if you are about to update some content. For our tutorial, we import fresh content, and the post type to choose from in the drop-down menu is “Posts.”
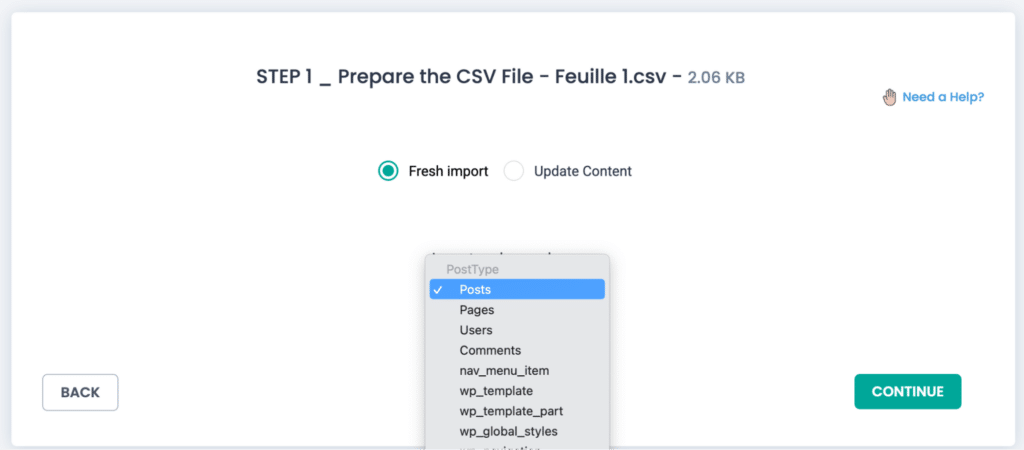
Click on the Continue button.
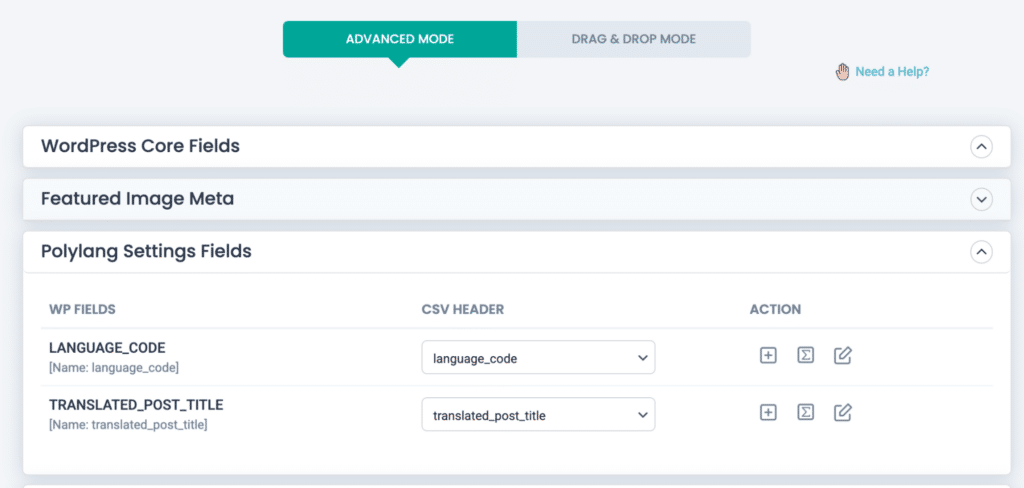
Step 4: Do the Mapping
Check that the two Polylang settings, LANGUAGE_CODE and TRANSLATED_POST_TITLE fields, match your CSV file.
You can also check the mapping of the tags and taxonomies from the subsection Terms and Taxonomies.
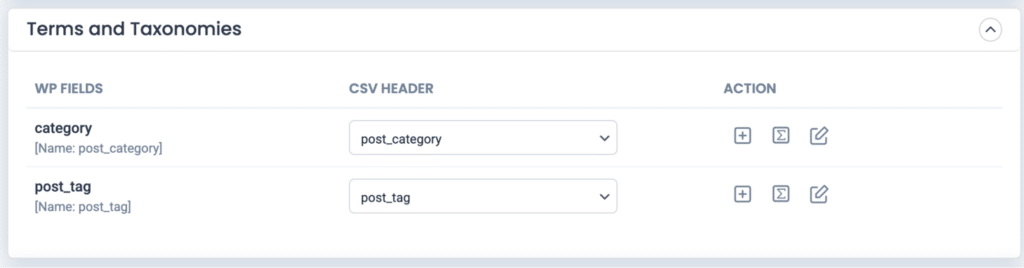
Save the mapping template and click on Continue.
Step 5: Configure Import Options
Before starting the import process, it’s essential to configure the settings to align with your specific needs. This step allows you to manage media uploads and fine-tune import options for optimal results.
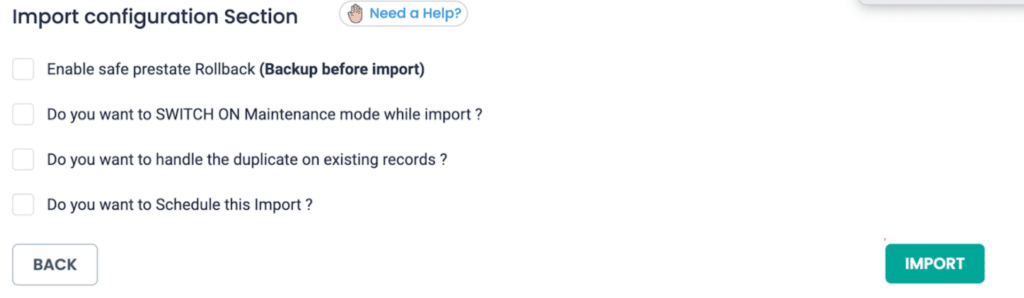
You’ll have the flexibility to enable or disable key configurations, such as creating a backup (Safe Prestate Rollback) before the import, activating Maintenance Mode to avoid disruptions, and handling duplicate records in your database.
Additionally, you can decide whether to schedule the import later or execute it immediately.
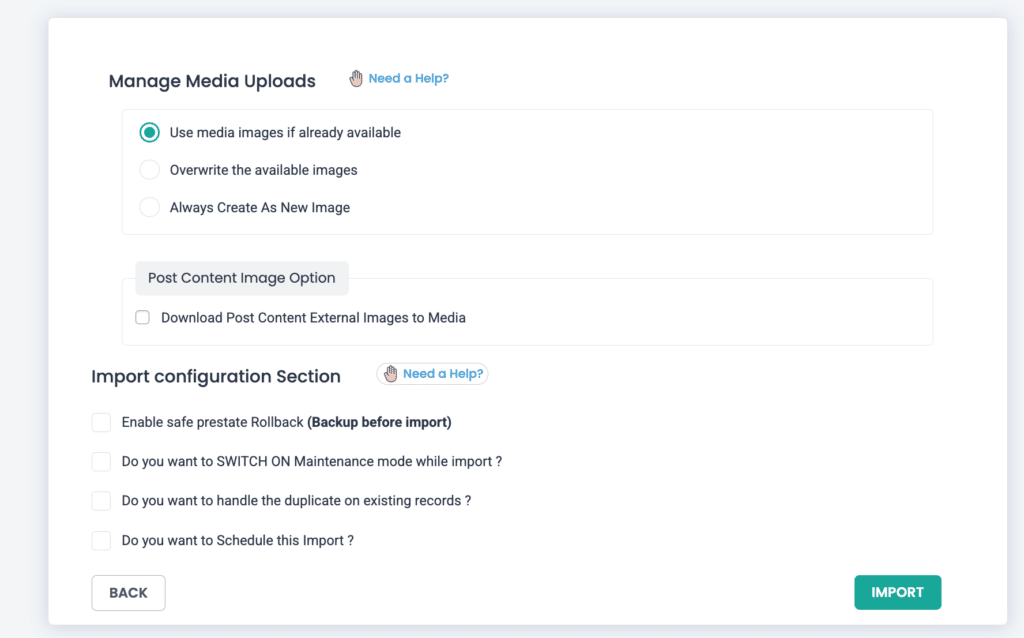
Once you’ve reviewed and selected the options that suit your requirements, click Import to begin the process.
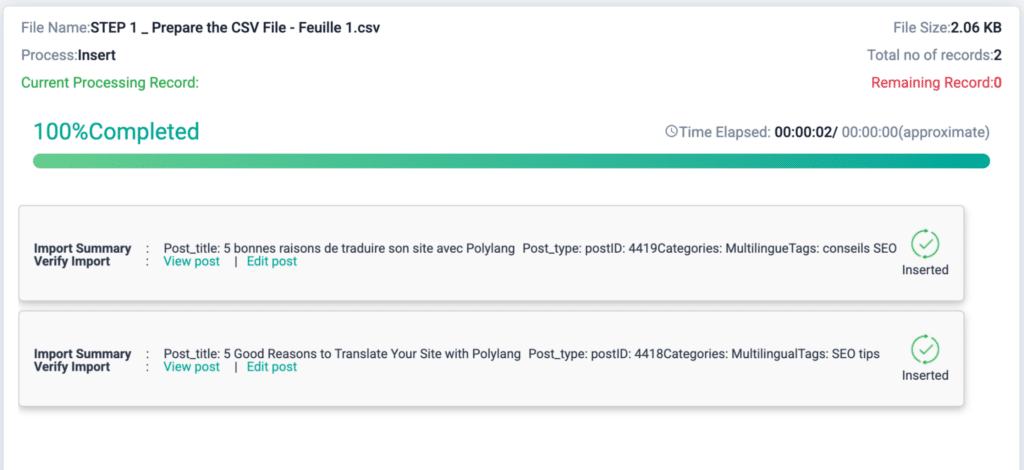
Wait until the process is 100% complete; you should see the import summary as shown below:
Step 6: Verify That the Multilingual Import Worked
After completing the import, it’s essential to confirm that everything was processed correctly.
Start by visiting your WordPress Admin Dashboard and navigating to the Posts section. Check if both the original and translated posts are listed.
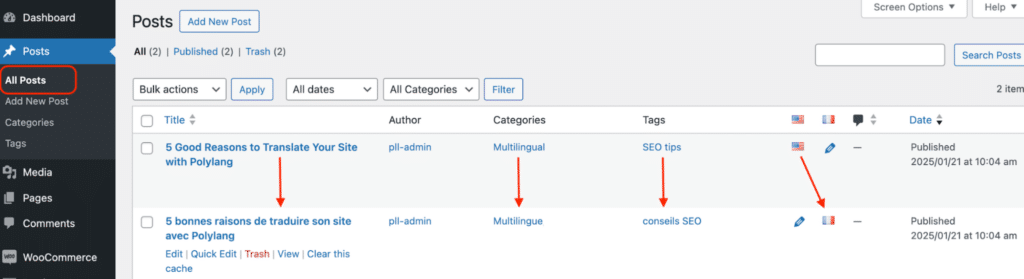
Next, visit your site to ensure the translations are functioning as expected. Use the language switcher on your website to verify that:
✅ Each post is correctly linked to its corresponding translations.
✅ The content displays properly in the respective languages.
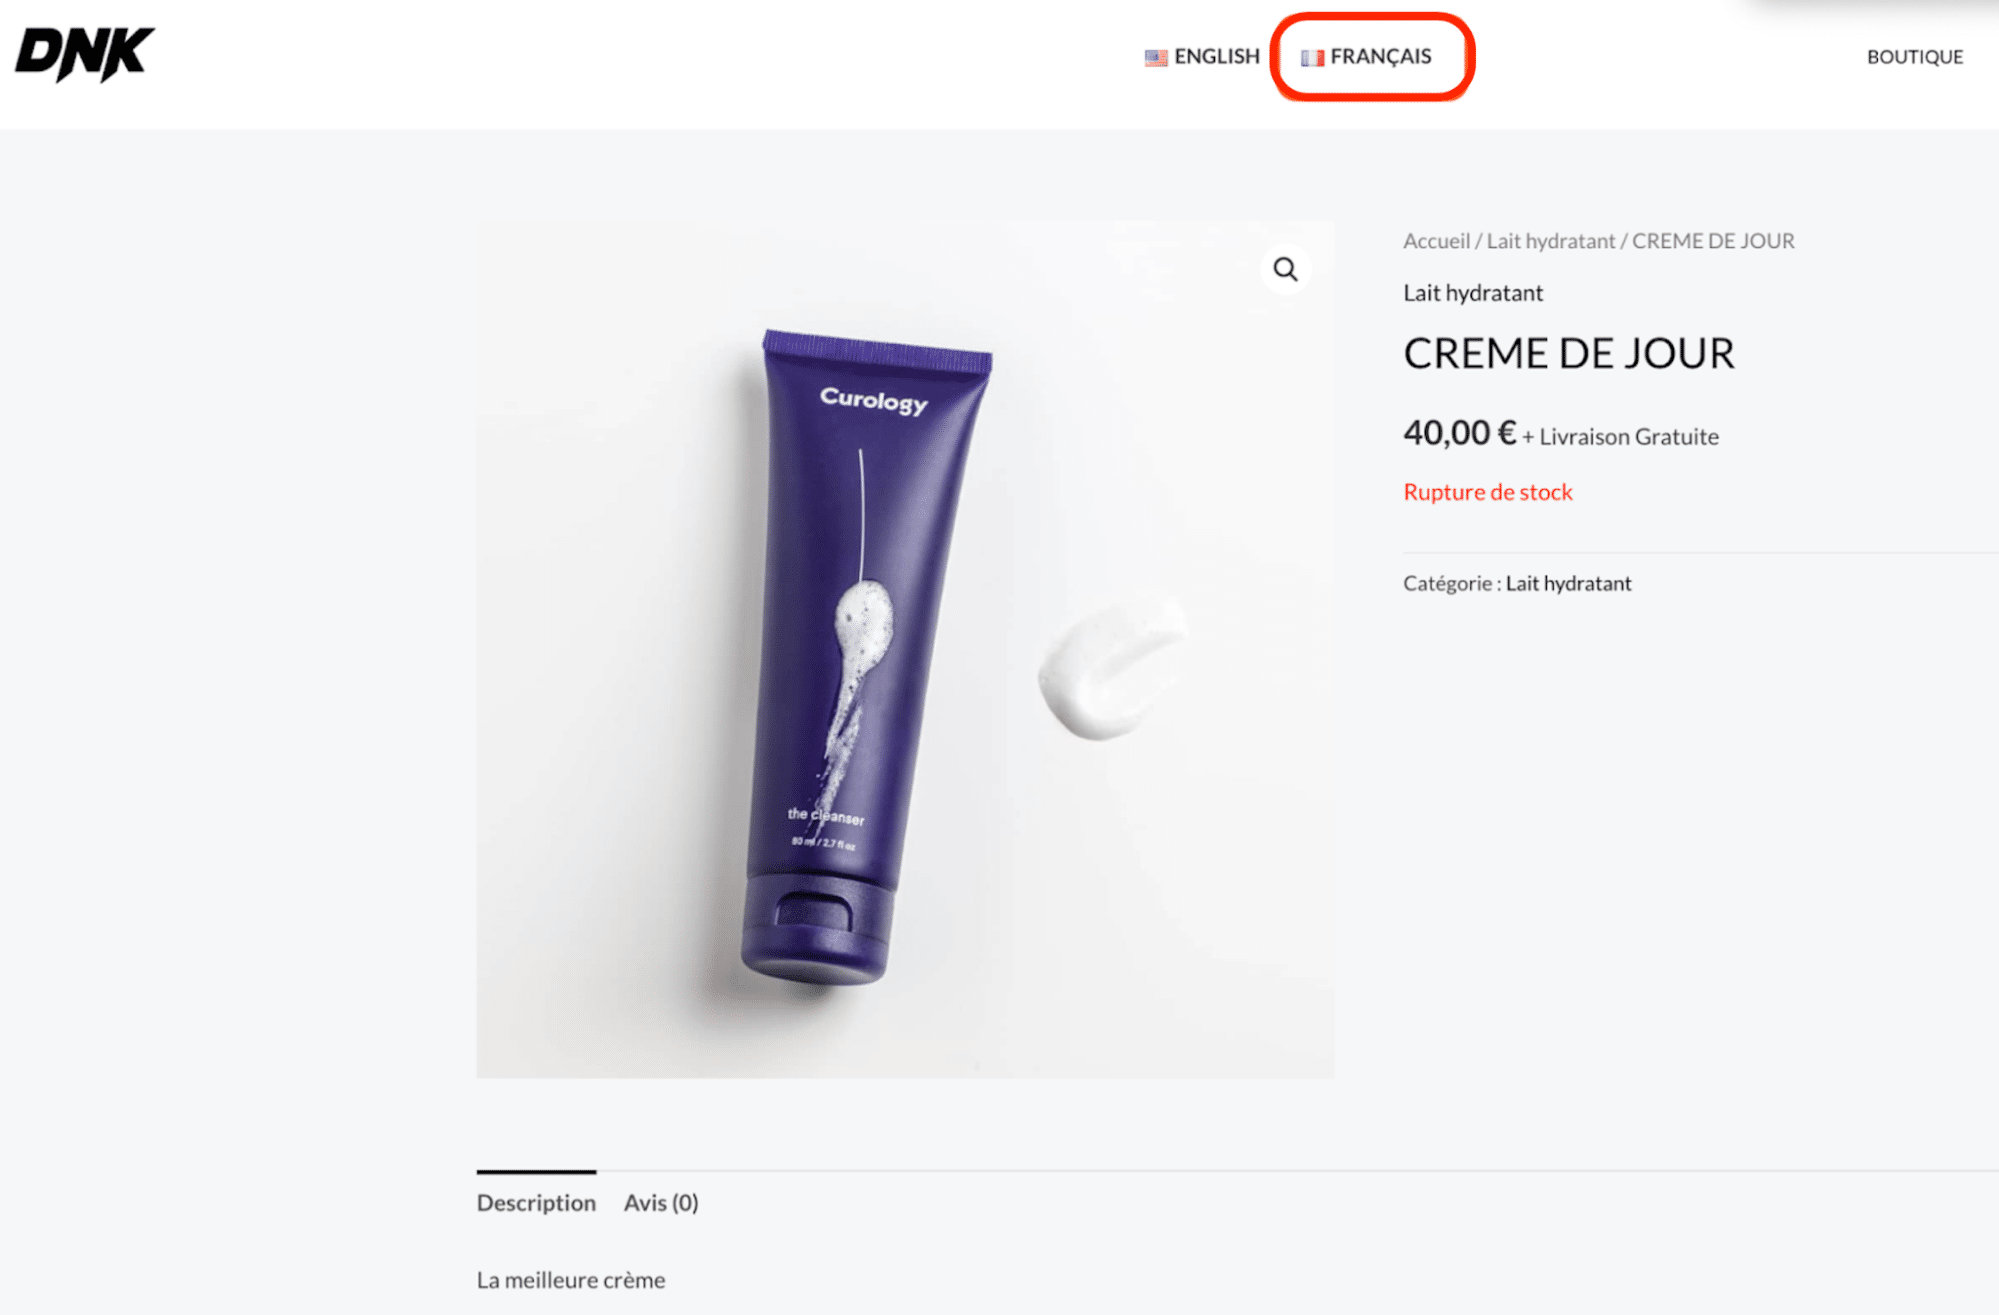
| Imported English post | Imported matching French post |
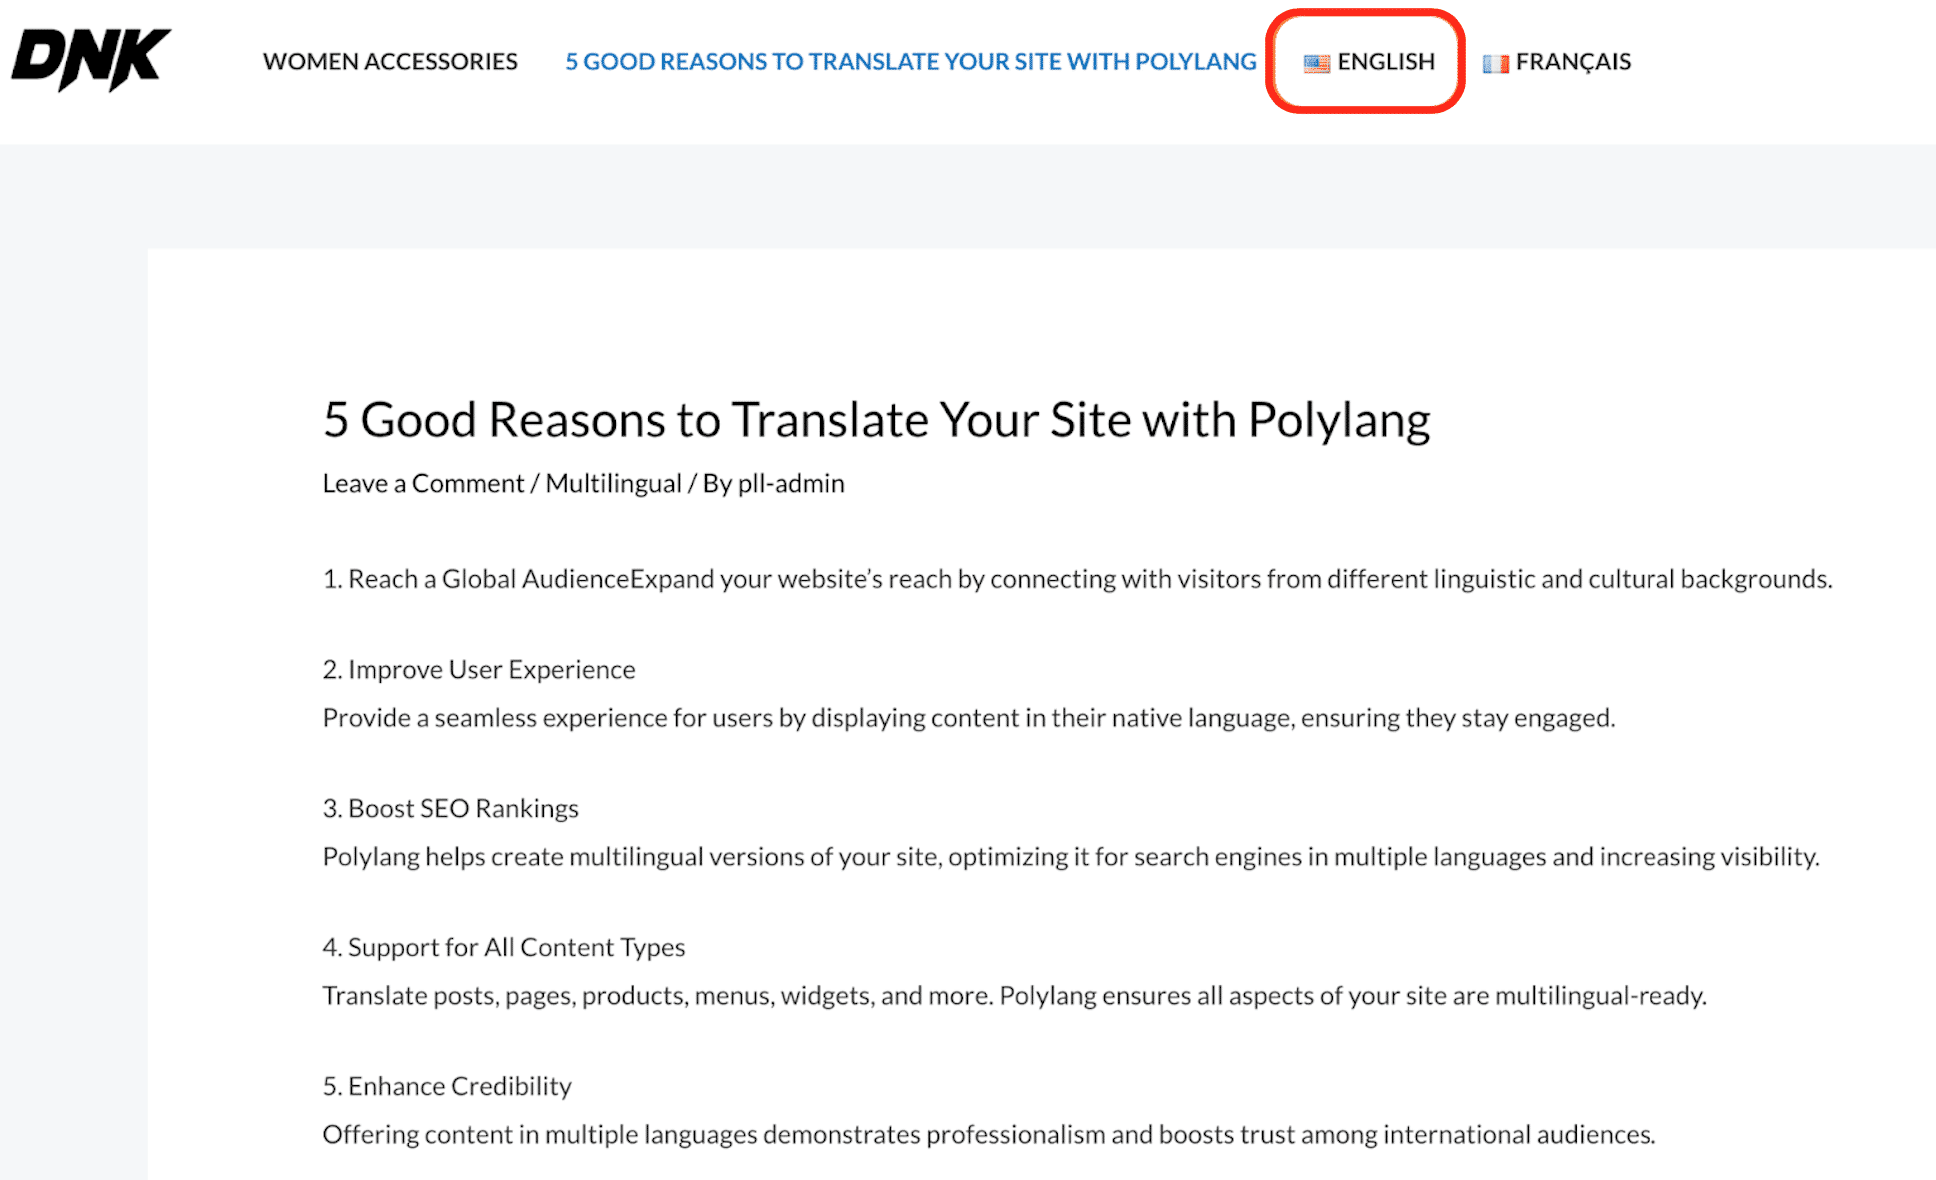 | 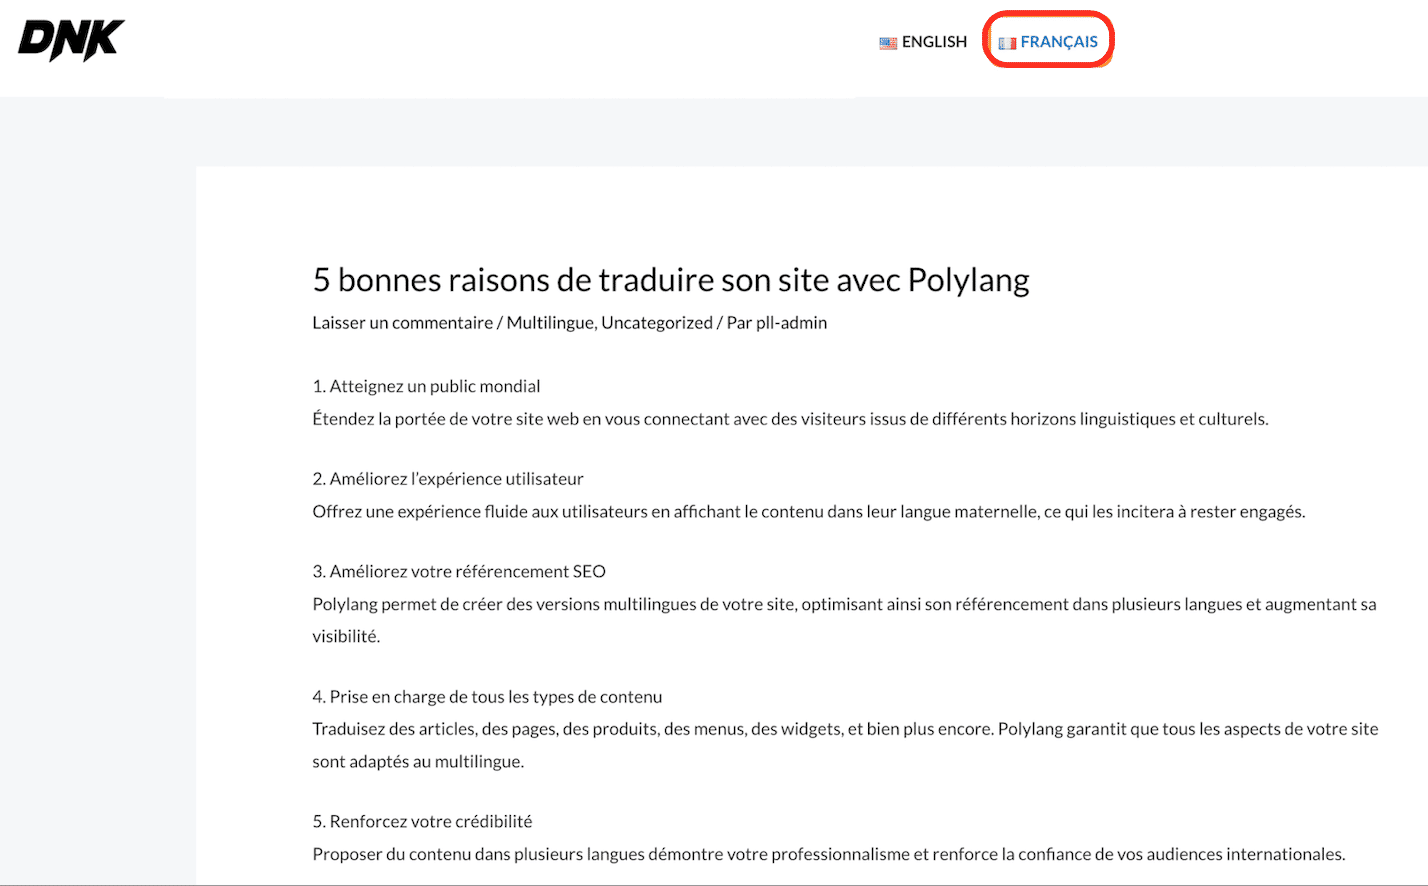 |
Importing Multilingual Pages with WP Ultimate CSV Importer Pro
The import process for pages is similar to that of posts. The only difference will be to replace the “post” element with the “page” element in your CSV file, as shown in the example below:
- Page_title column: includes the titles of the pages you want to import. Each row should correspond to the page title for that specific content.
- Page_content column: use this column to include the body text of your pages.
- Language_code column: defines the language for each page. Use the language codes already configured in Polylang (e.g., “fr” for French, “en” for English).
- Translation_post_title column: helps Polylang link the translated page to its original version.
Importing Multilingual WooCommerce Products with WP Ultimate CSV Importer Pro
The import process for WooCommerce products follows the same steps as importing posts or pages described above. You’ll use a structured file with the required columns, map the fields accordingly, and configure the import options to suit your needs.
| ⚠️ Important: Ensure Polylang for WooCommerce is running before importing product translations. Polylang for WooCommerce allows you to create multilingual products and ensures that all translated content is properly linked to the original products. |
Step 1: Prepare the Structure of your Import Products File
To ensure a successful import process of your WooCommerce products, follow our guidelines to structure your file.
File format
- Your WooCommerce import file should be in CSV, XML, or Excel format.
- Each row represents a product.
- Use columns to specify different attributes of the content, especially the language-specific details related to Polyland.
Recommended columns
You may want to include the following important columns before you start importing your products into WordPress:
- Post_title column: includes the titles of the products you want to import. Each row should correspond to the post title for that specific content.
- Post_content column: you can put the product description here.
- Language_code column: defines the language of each post. Use the language codes configured in Polylang (e.g., “fr” for French, “en” for English).
- Translation_post_title column: helps Polylang to link the translated product to its original version.
- Product_attribute: if you want to import the translation of several variations. Make sure to add the “I” separator between each value. For instance, if two colors are possible, it should look like this: blueIpink.
The file should look like this:

| ⚠️Warning: If a value is missing in the CSV, the corresponding value in the product will be deleted. Do not remove columns to simplify the CSV; instead, keeping all necessary columns intact is essential to prevent data loss during the import process. |
Step 2: Export Your File in .CSV, Excel or XML
To export your file in CSV, Excel, or XML format using a spreadsheet application like Microsoft Excel or Google Sheets, follow these steps:
Click on File in the top menu. Then, hover over Download and select Comma-separated values (.csv). Your file will automatically be downloaded in CSV format.
Step 3: Import Products From the .CSV file to WordPress
Now that you’ve prepared your CSV file with all the necessary product data, it’s time to import it into WordPress using the WP Ultimate CSV Importer Pro plugin. Follow these steps to ensure an effective import:
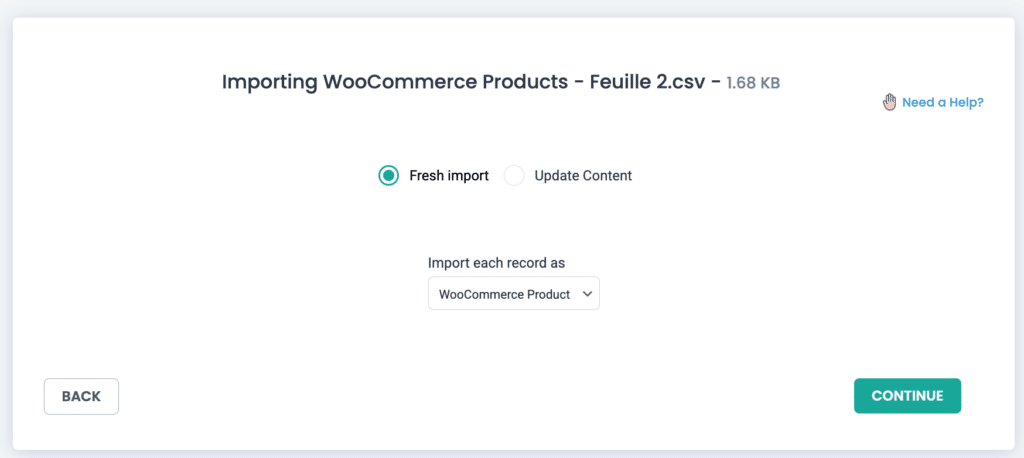
Go to the WP Ultimate CSV Importer Pro section in the WordPress dashboard and upload your CSV file:
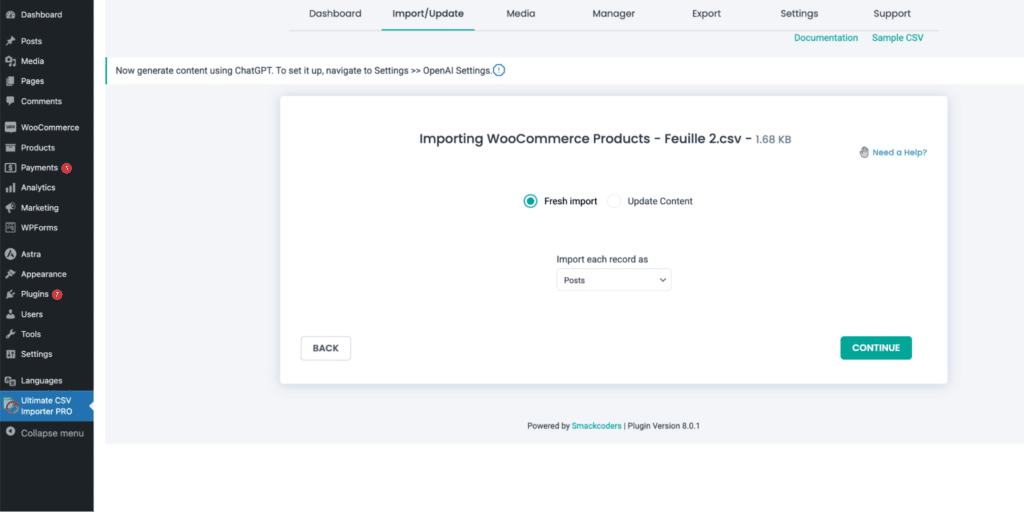
Select the WooCommerce Products import option from the list of available content types. It ensures that the plugin knows you are importing WooCommerce products, not regular posts or pages. Click Continue.
Step 4: Do the Mapping
Mapping ensures that the data in your CSV file is correctly assigned to the appropriate fields in WordPress.
You must map all the fields , especially the Polylang Settings Fields and the Product Meta Fields. Check that they all match.

Step 5. Configure Products Import Options
Before importing your WooCommerce products, it’s important to configure the import settings to suit your specific needs. You can manage media uploads, enable a backup (Safe Prestate Rollback) to safeguard your data and activate Maintenance Mode to prevent disruptions during the import. You’ll also be able to handle duplicate product records and decide whether to schedule the import or run it immediately.
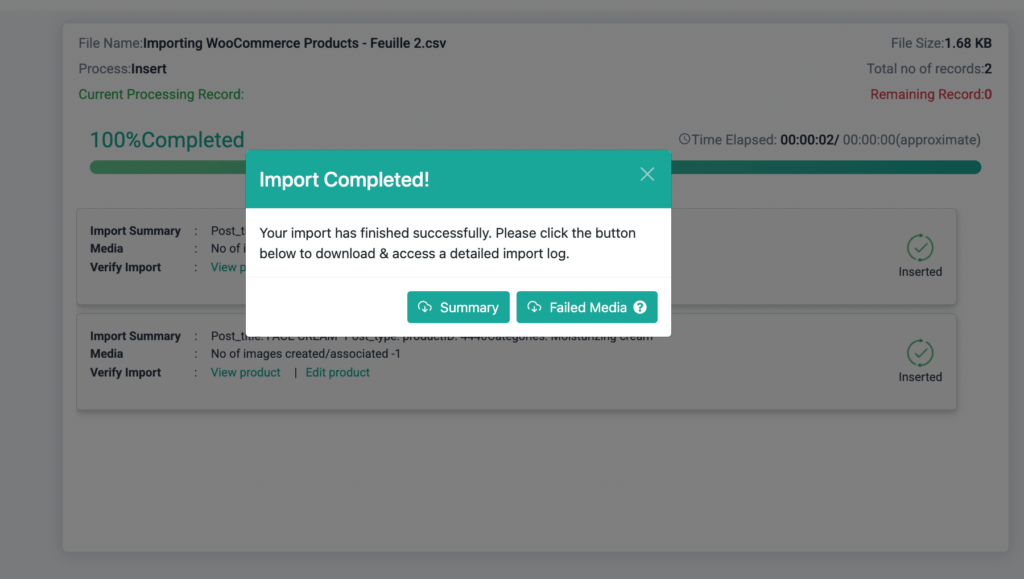
Click on the import button to import your WooCommerce Products, then wait until you see the “Import Completed” pop-up.
Step 6: Verify that the Multilingual Products Import Worked
After completing the import, perform these two essential checks to ensure that your multilingual product import has been successful and that your products are correctly linked across all languages.
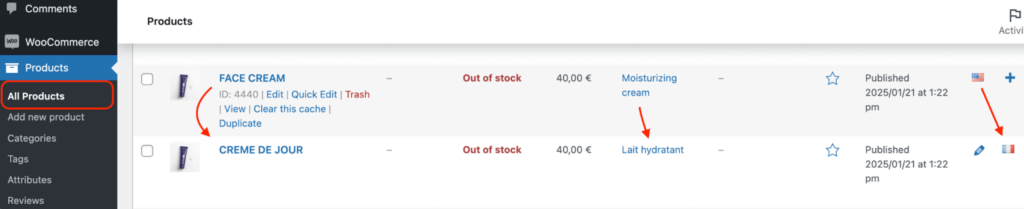
In the admin panel:
- Go to the Products section in your WordPress dashboard.
✅Check each product under the Polylang language flags (e.g., FR and US) to confirm that the products appear in the correct languages.
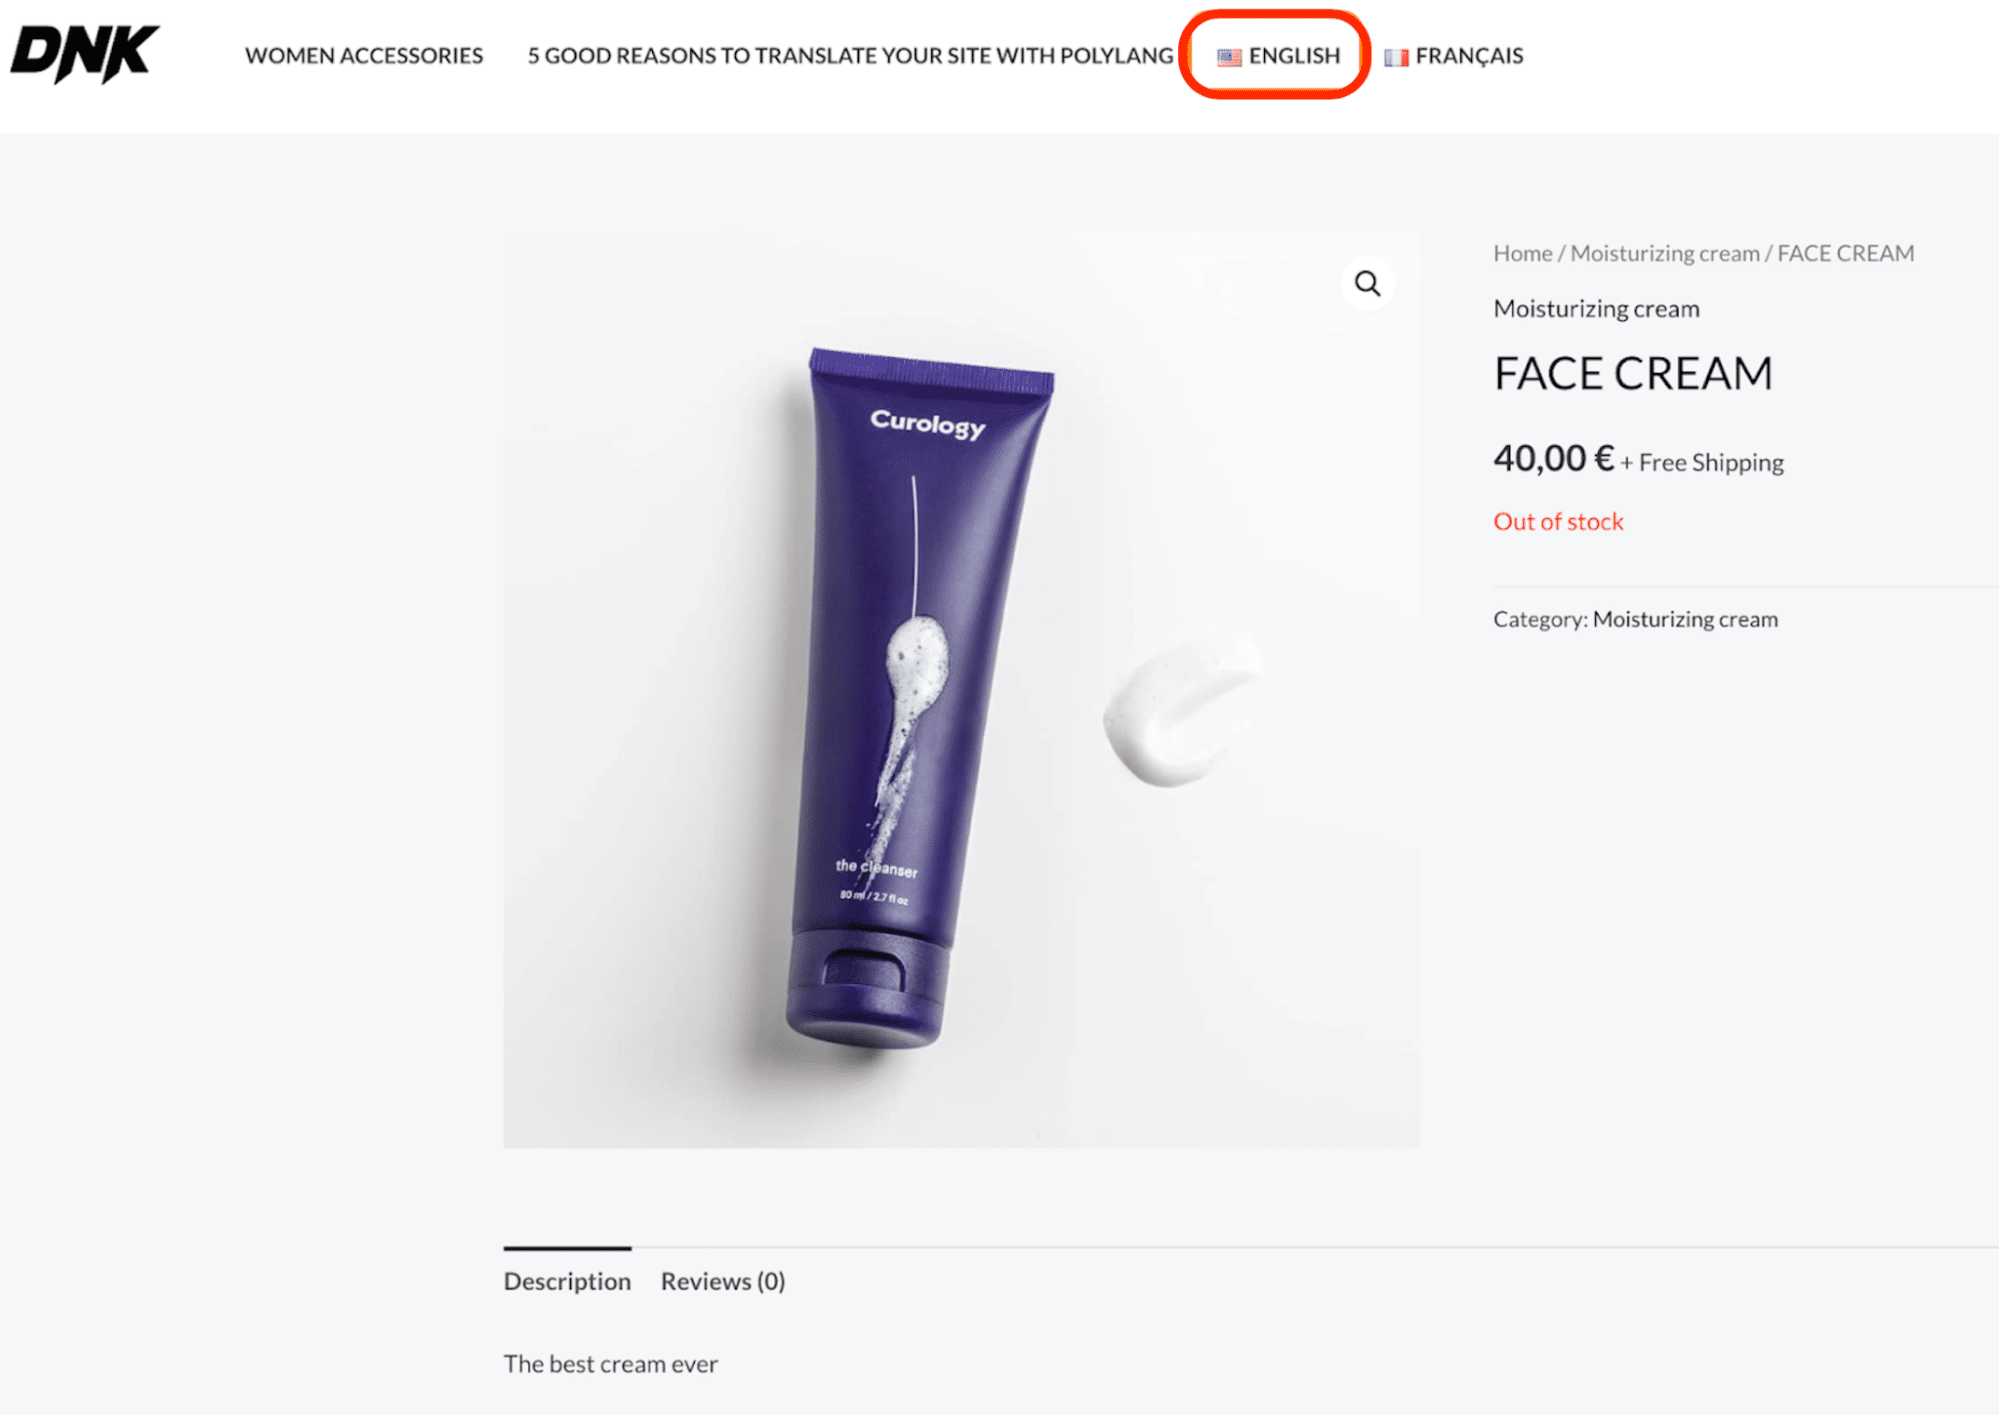
On the frontend:
Use your website’s language switcher to navigate the different language versions.
✅Verify that both products are correctly linked and that the translations match the original content.
| Imported English product | Imported matching French product |
 |  |
Importing Other Multilingual WooCommerce Content with WP Ultimate CSV Importer Pro
With WP Ultimate CSV Importer Pro, you can import translations for various WooCommerce content types, including categories, tags, orders, reviews, coupons, and refunds. All you need to do is fill out the columns in your CSV file for primary and secondary languages (e.g., English and French content on each row).
Additionally, ensure your CSV includes the following essential columns:
- Language_code column: Defines the language for each entry.
- Translation_post_title column: Links the translation to the original content.
You have two options for structuring your data:
- Single CSV File: You can include all necessary columns for both primary and secondary languages in one file.
- Separate CSV Files: You can create a dedicated CSV file for each type of content and manually select the post type during the import.
Example 1: Importing Multilingual WooCommerce Orders
To import multilingual order, follow those easy steps:
- Ensure the corresponding order products are already present on your WordPress site. Without the products, the order data cannot be linked correctly.
- Choose WooCommerce Orders as the post type in WP Ultimate CSV Importer Pro.
- Match the CSV columns to the corresponding WooCommerce order fields in WordPress.
- Adjust settings like handling duplicates, scheduling, or enabling Maintenance Mode.
- Start the import process and verify that the orders are correctly added in all specified languages.
Repeat the process for any other module, such as customer reviews.
Exporting Multilingual Content with WP Ultimate CSV Importer Pro and Polylang
Exporting multilingual content is an essential feature that helps you manage and update your translations efficiently. You can easily share your data with translators for modifications, corrections, or updates. Exporting also allows you to maintain a backup of your multilingual content or migrate it to another website.
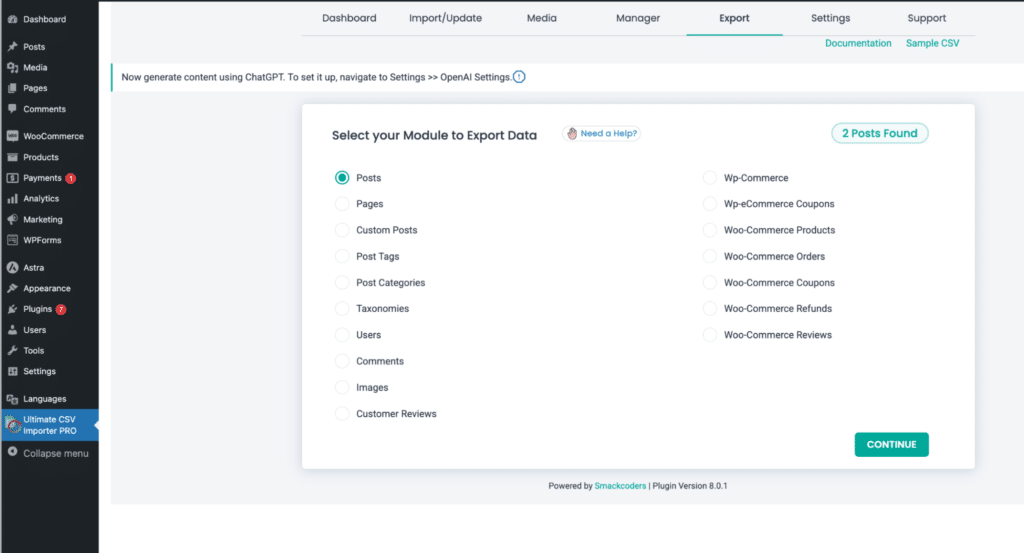
Step 1: Select What to Export
Navigate to WP Ultimate CSV Importer Pro > Export in your WordPress dashboard.
Depending on the content you need, you can choose the module you wish to export, such as Posts, Pages, or Products.
Step 2: Choose the Export Settings
Decide the format for your export: ZIP, CSV, or Excel, based on your needs. Then, customize the export using various options, including:
- Delimiters: Automatically structure data for seamless readability.
- Google Sheets: Export directly to a linked Google Sheet.
- Time period: Export content created within a specific timeframe.
- Post status: Filter by statuses like Draft, Published, or Pending.
- Authors: Export content from particular authors.
- Post ID or titles: Focus on specific posts using their ID or title.
- Categories: Filter data by category for targeted exports.
- Inclusions: Define specific fields to include in the export.
- Scheduling: Automate the export to run at a preferred time.
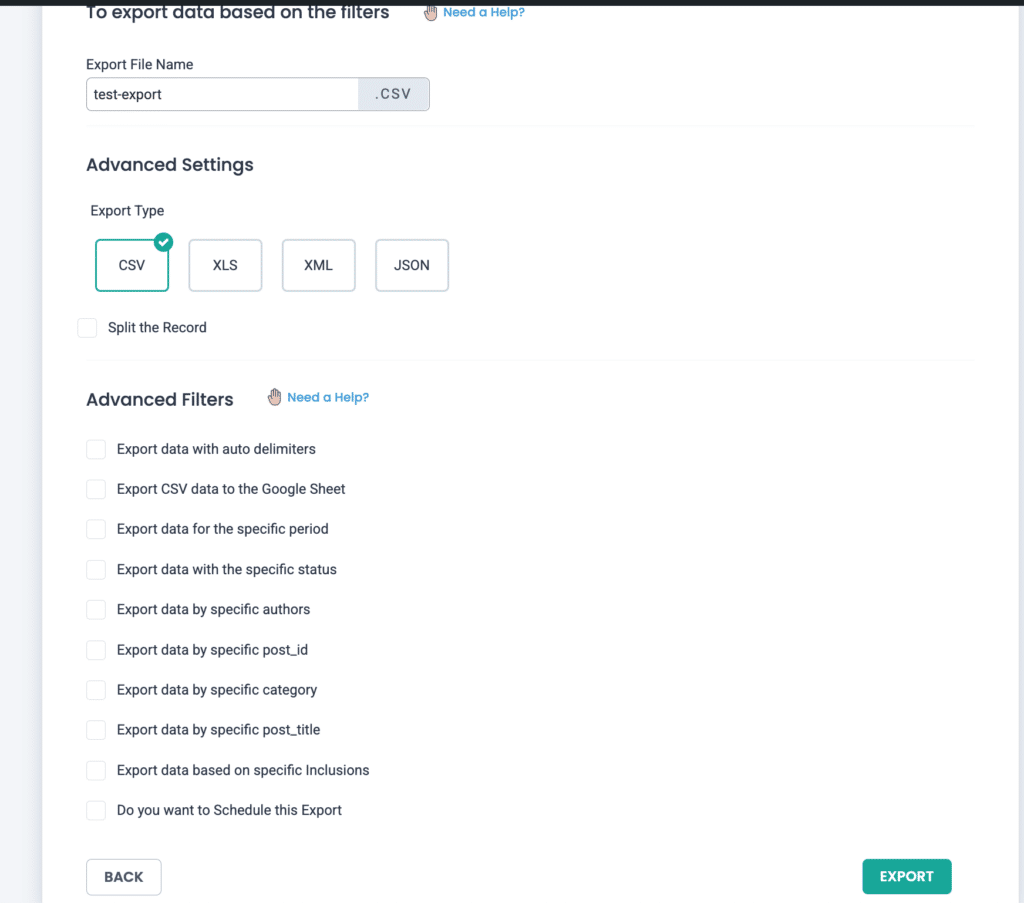
Once configured, proceed to the next step by clicking to finalize your export. Simply click on the EXPORT button.
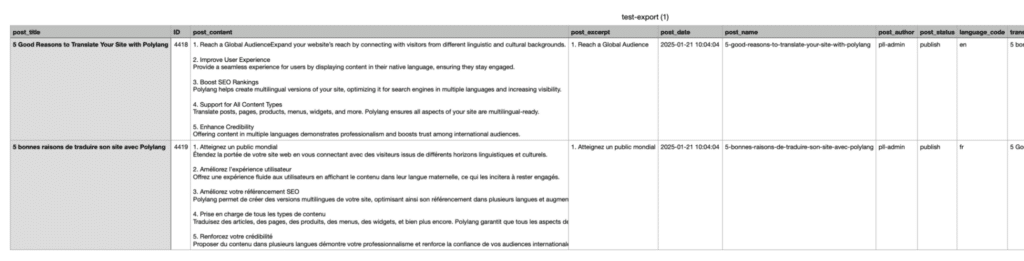
Here’s our CSV file with both content exported: