Want to learn how to add a language switcher to your WordPress site? You’ve come to the right place. A language switcher (or language selector) is your website’s multilingual navigator, allowing visitors to effortlessly explore content in different languages. It empowers your international audience to be able to select their preferred language when they are browsing your site.
A language switcher is essential for every multilingual website, particularly for public services and companies located in countries with multiple national languages such as Canada or Switzerland. Additionally, it plays a crucial role for international brands, multilingual WooCommerce sites, and the hospitality industry. Just try to picture Airbnb without a language switcher – they’d miss out on many international bookings and end up with frustrated users unable to access listings in their own language.
Alright, it’s time to make your international audience happy with a functional language switcher. In this article, we show you four simple steps to add a language switcher to your WordPress site.
How to Add a WordPress Language Switcher in 4 Simple Steps?
The easiest way to add a language switcher to your WordPress site is to use the Polylang plugin. It’s the most popular, best-rated, and SEO-friendly WordPress Multilingual Plugin out there (+700K installations and 4.7/5 rating), and it’s for free. Here are four steps to follow to help international visitors in selecting their preferred language:
1. Installing Polylang
- From your WordPress dashboard, install and activate Polylang from Plugins > Add New Plugin
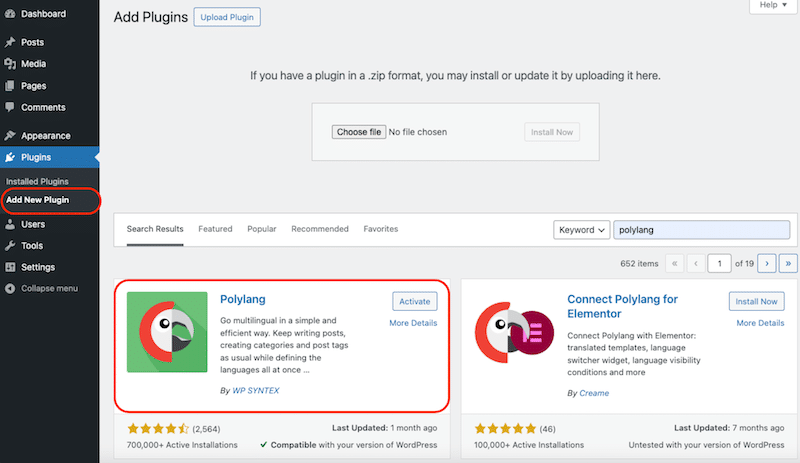
Installing Polylang from the WordPress admin
- Follow the installation wizard and add the languages you need, using the dropdown menu.

Adding languages to my site (and to my language switcher)
- Decide what to do with your content without a language: which language should be applied to all your content without an assigned language?
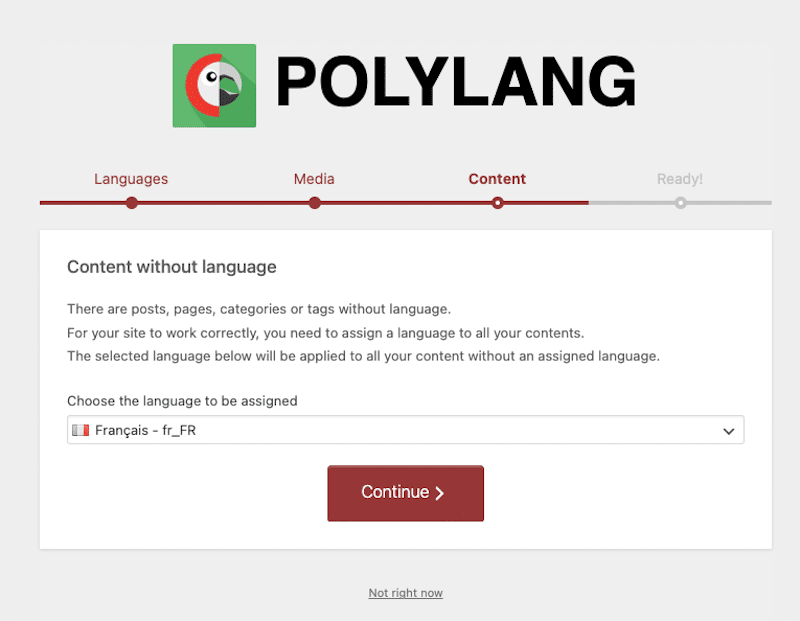
Selecting the default language if there is no target language
- And you have configured Polylang! You are now ready to translate your content and create your language switcher.
2. Deciding the Display Location for Your Language Switcher
Now that you have added all the languages to your WordPress site, it’s time to decide where to display your language switcher. The main navigation menu is usually the most popular place to have it, but we are also exploring a few other locations to keep your options open.
Display the Language Switcher in the Navigation Menu
The main idea here is to create one language switcher per menu and language. In our case, we have three languages: French, English, and Italian so we will need to create 3 menus and a language switcher for each of them.
- Go to Appearance > Menus – You should see the option to add a Language switcher in the menu items.
⚠️ Are you not seeing the Menus option under Appearance? You may be using a Block theme. Jump directly to the Site Editor section. |

Opening the Menus section to add a language switcher
Hint: if the language switcher is not showing in the menu, open the screen options at the top of the page and make sure the Language switcher box is checked.
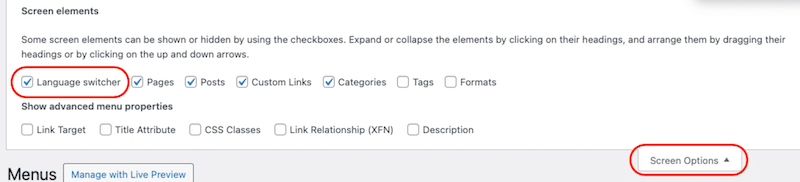
Opening Screen Options to show the language switcher in the navigation menu
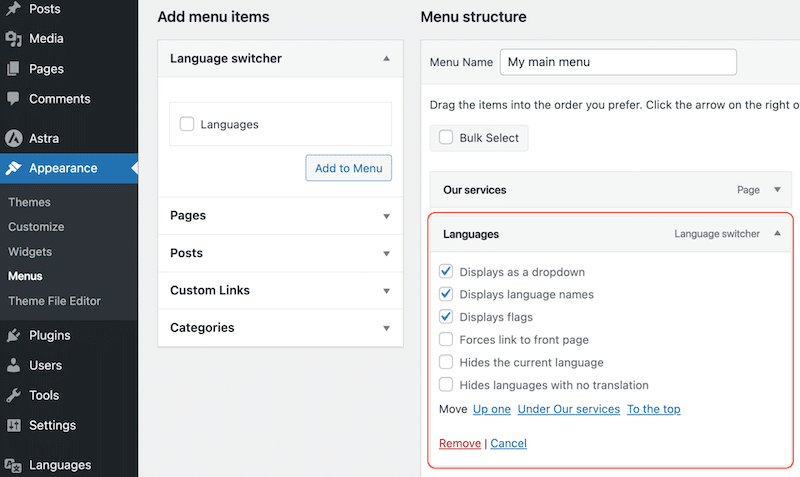
- Check the Languages box and click on the Add to Menu button.
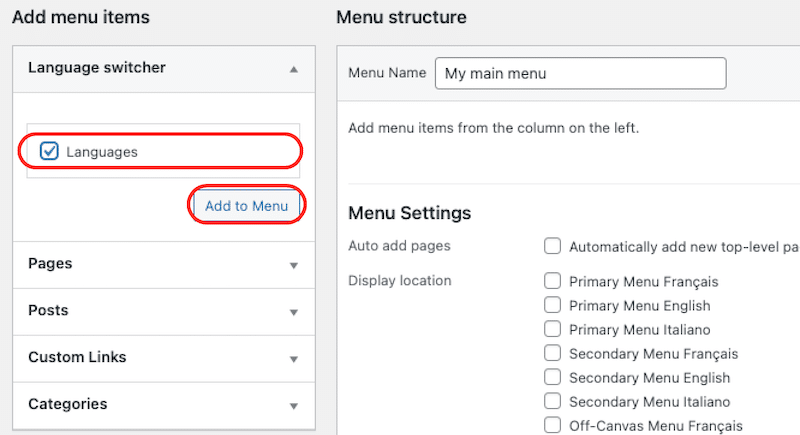
Adding the language switcher to the main menu
- From the Menu Settings section, rename your menu to your first language. Let’s start with French, which we call “My main Menu FR”.
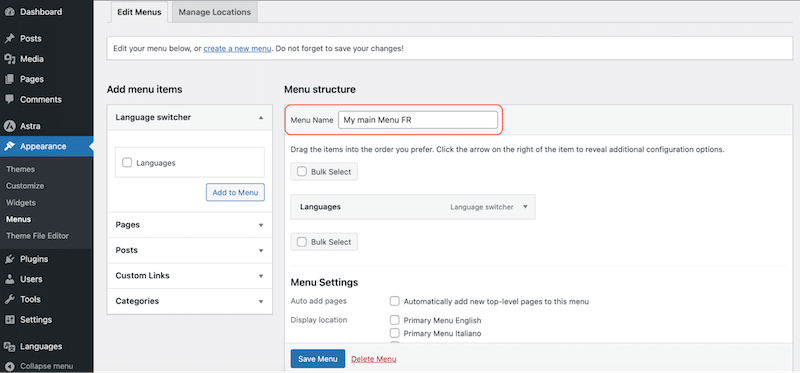
Rename the menu
- From the Pages section, add all the French pages to the navigation menu.
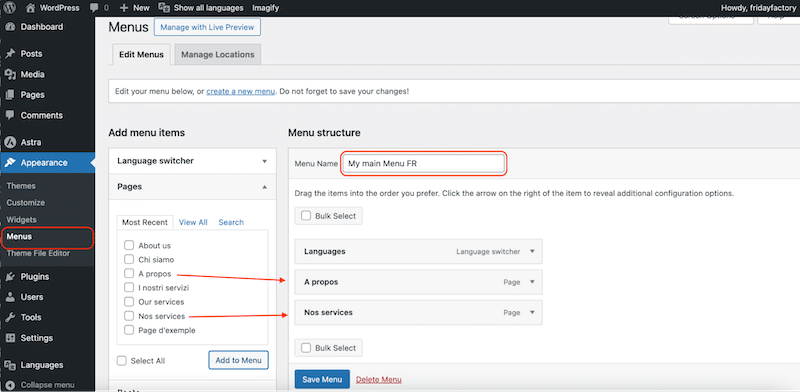
Setting the Primary menu as the language switcher location
- From the Menu settings, select the location “Primary Menu Français”.
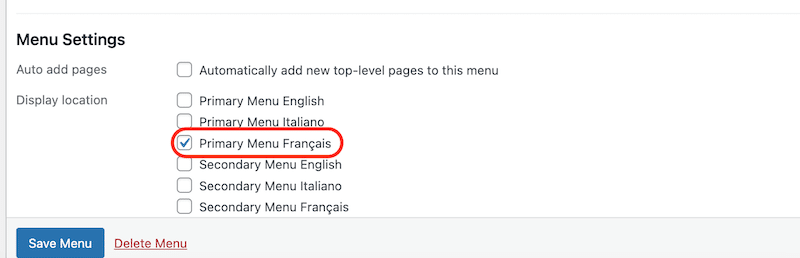
Selecting the location for the French switcher
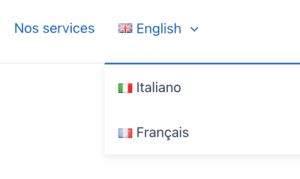
- That’s it! You now have a language switcher in your French navigation menu:
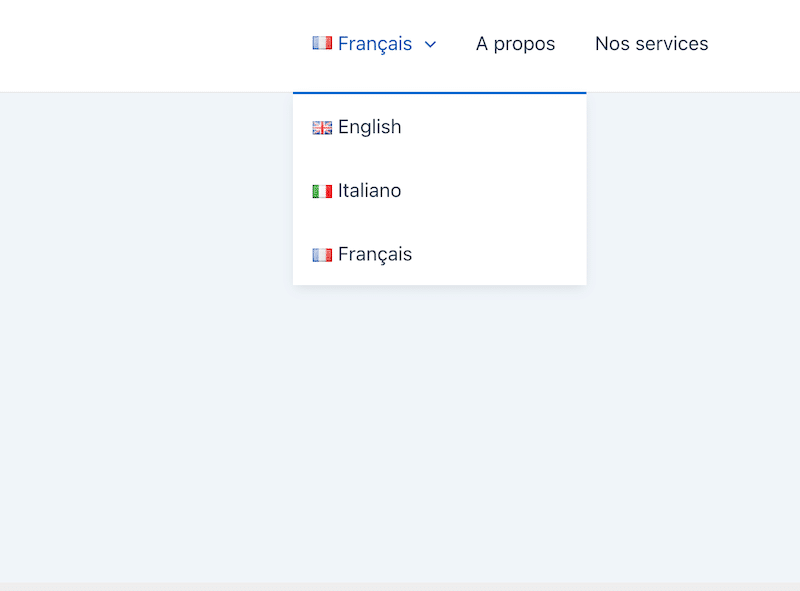
Dropdown language switcher in a few clicks with Polylang on the French page
Repeat the action for each language. Let’s see a short example for English.
- In Appearance > Menu > Create a new menu. Rename it like we did “My main Menu EN”, add the language switcher and the English pages.
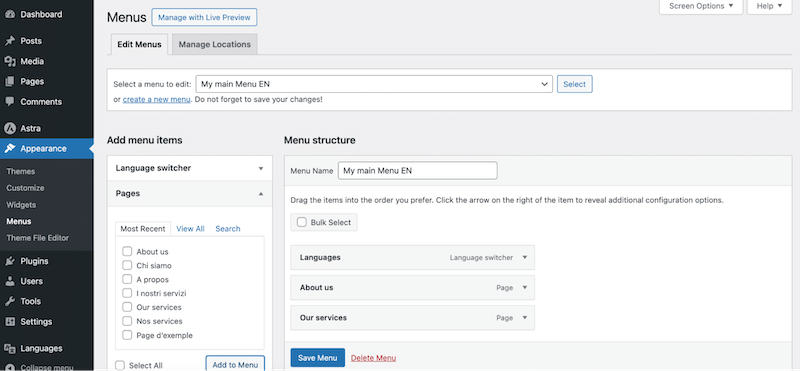
New English menu to add the language switcher
- Don’t forget to select the location by checking the Primary Menu English box:
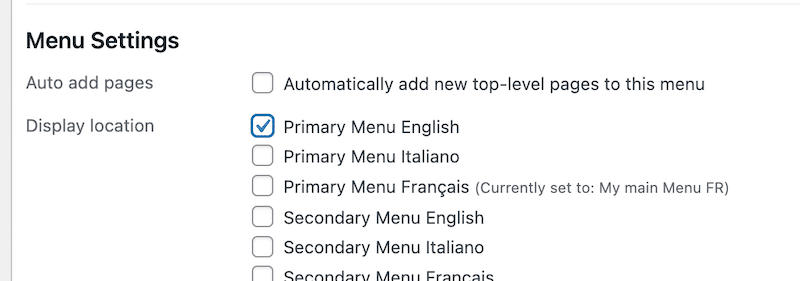
Selecting the location for the English switcher
Repeat the same steps for all your other languages.
Display the Language Switcher in a Widget
To add a language switcher in a widget, go to Appearance > Widgets and click on the + icon to add the Language Switcher widget. You can choose to have it in the header, sidebar, or even the footer. We will select the Footer Bar Section 1 location.
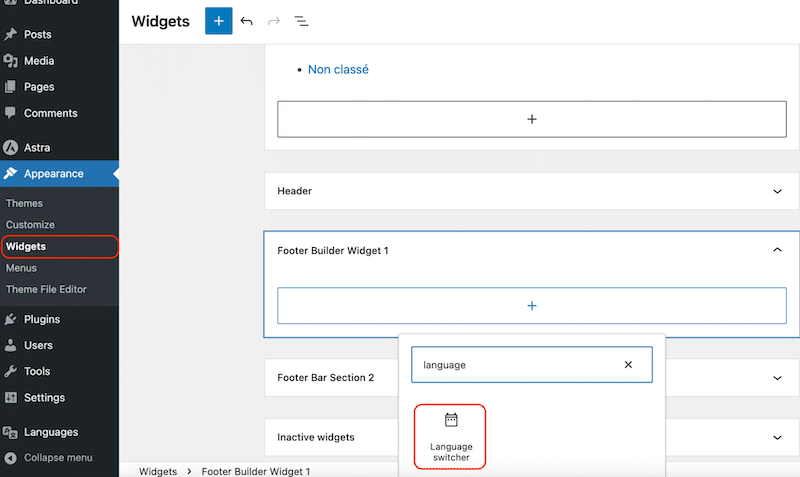
Adding a language switcher from the Widgets section
You’ll find the exact same options explained previously, with an additional one: “The widget is displayed for” – which aims at specifying the language for which the switcher should be displayed.

“The widget is displayed for” options for each language
Display the Language Switcher in the Footer with Links
If you want to add a basic language switcher with links in your Footer, you can also do it from the WordPress Customizer.
- Go to the Footer Builder section. From there you can add a widget anywhere in the footer:
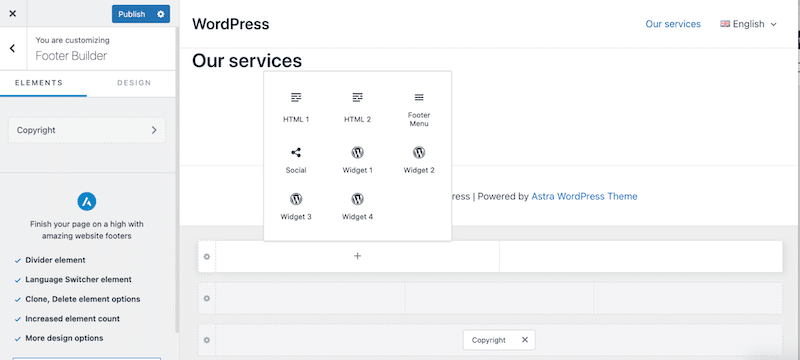
Adding a widget to the footer
- Select the Language switcher widget and choose the options you want:

Language Switcher widget from the Customizer
- Check the Display language names box.
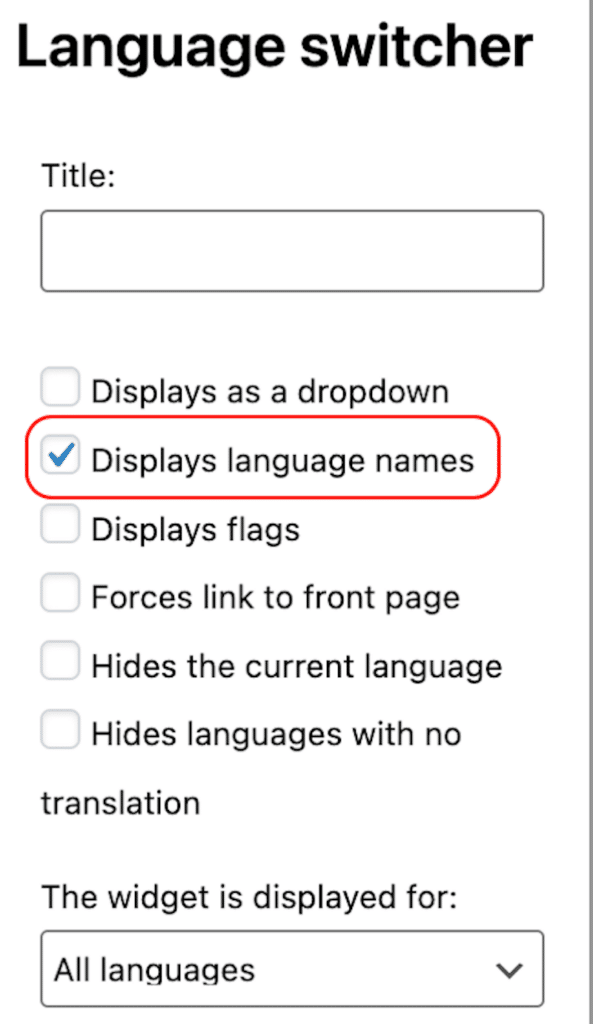
“Displays language names” option
- You are all set! You now have a language switcher with links in your footer:

Language switcher with links in the footer
Display the Language Switcher in a Full Site Editing
Important – If you are using a block theme:
If you are using a block theme like “Twenty Twenty-Four”, the Menus section customization is not under the Appearance section anymore. In that case, you have two options to display the language switcher:
- Free option: Install the legacy widget plugin from Polylang, add the language switcher to it, and display the widget wherever you want.
- Paid option: Use Polylang Pro to add the language switcher via the new widget block editor.
3. Configuring Display Options
With Polylang, you have several options to adjust how the language switcher appears on your WordPress site. The configuration involves specifying how language options are displayed, such as dropdown menus, or side-by-side, for example.
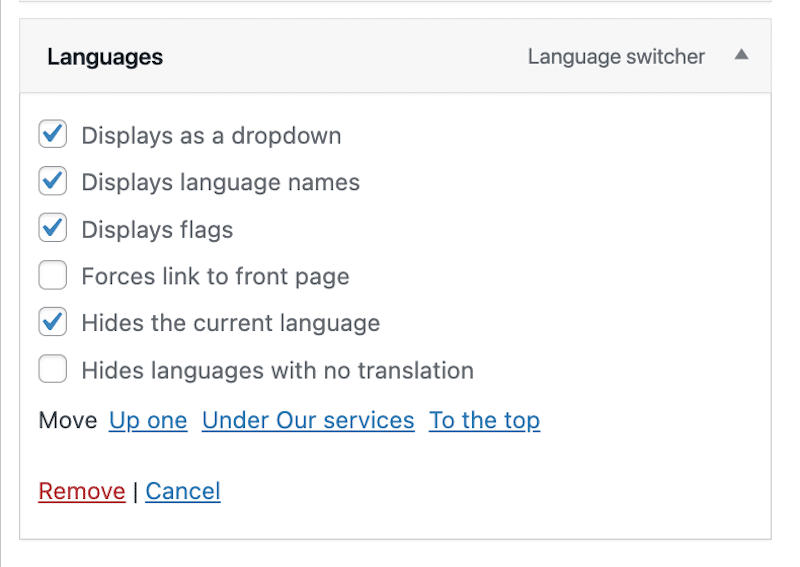
- To configure your language switcher, go to the Menus section, and simply open the Language Switcher box to access all the settings.
Language switcher options
There are different options to display the language switcher such as:
- Displays as a dropdown: Allows users to select their preferred language from a list. If you don’t check those options, the languages will be simply displayed side-by-side in the navigation menu.
| Displays as a dropdown | Displays all languages side-by-side in the menu |
 | 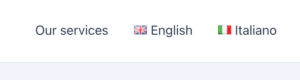 |
- Displays language names: Shows the names of each language, providing users with clear text labels to identify and choose their desired language.
- Displays flags: Decides to include flags as visual indicators. Using them to represent different languages can help users quickly recognize and select the language of their choice. The default flags in Polylang are the famfam flags, which integrate well into WordPress and have a license compatible with WordPress’s GPLv2.
- Hides the current language: Hides the language that is currently in use on the website, contributing to a cleaner and more streamlined selector. That’s how to hide the current language:
Hide the current language options
In a few clicks, we improved our language switcher by making it more straightforward for our international visitors.
| Language switcher by default | Customized language switcher: English hidden from the dropdown when some English content is displayed. |
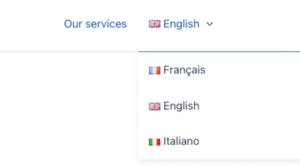 | 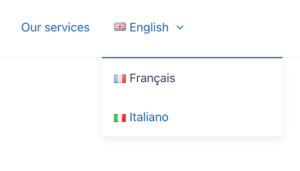 |
4. Customizing Language Order, Names, and Flags
How to Change the Language Order In Polylang Language Switcher
You can change the language order in the language switcher directly from your WordPress dashboard.
- Head to Languages > Languages >Click on Edit under the language of your choice.
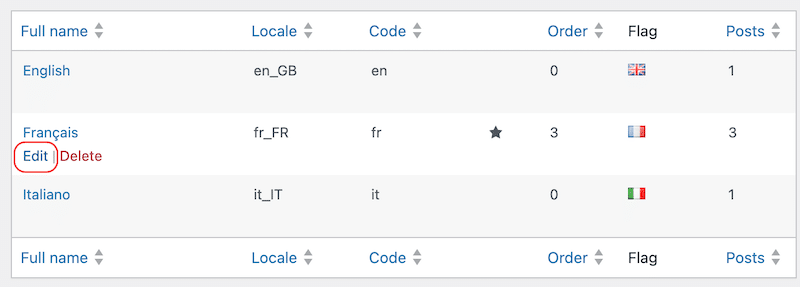
The Edit button from the Languages section
- Scroll down to the Order field > Add a number to change the position of the language in the switcher.

Field to change the order of languages in the language switcher
| French was first | French is now the last |
 |  |
How to Change the Language Name In Polylang Language Switcher.
Here are the steps to customize the language name of your language selector:
- Go to Languages > Languages > Press Edit under the language of your choice > Replace the existing content in the Full name field with the new name.

Field to change the name of languages in the language switcher
How to Add Custom Flags in Polylang Language Switcher
While Polylang offers flags by default, you can also add your custom flags in JPG, PNG, and SVG. Follow the steps below to make sure your flags will be properly displayed:
- Properly name the file using the WordPress locale available from Languages > Languages > Languages list table > the Locale column.
For example, if you want to upload a custom British flag, you’ll have to name it “en_GB”.
- Upload the custom flags files in the /wp-content/polylang/ directory. Feel free to create it if it’s not there.
| Hint: Avoid using the /wp-content/plugins/polylang/flags/ directory as your files will be removed upon the next update of the plugin. |

Locale name that must match the custom flag file name
- Head to Languages > Settings sub-menu and click on Settings under the URL modifications tab to expand it.
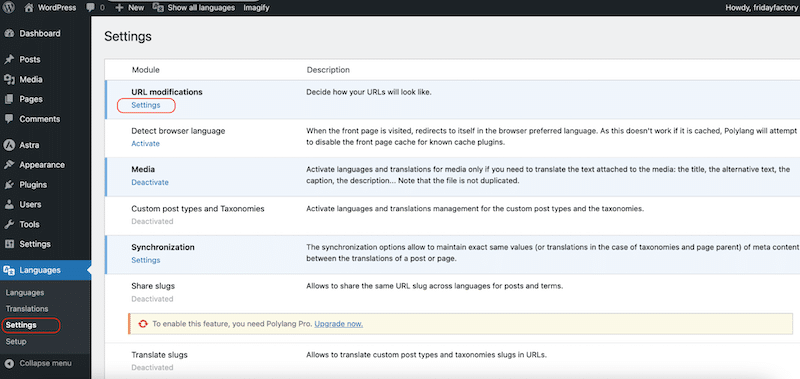
Settings section to confirm the changes in flags
- Click on the Save Changes button.
- Your new flags will appear on the front end.
|
Want to dive deeper? There is a full documentation available that explains in detail how to add custom flags to the language switcher with Polylang. |
Now that you’re more familiar with Polylang and the different ways of adding a language switcher to your site. Get some inspiration from the best practices outlined in the next section.
Displaying Language Switcher Best Practices
Without any surprises, language switchers play a crucial role in providing a positive user experience for multilingual websites. Here are some best practices to follow when implementing language switchers:
Make Sure the Language Switcher Is Easily Accessible to Users
If you aim to broaden your digital reach across borders effectively, ensure your language switcher is prominently displayed. It should be visible and accessible from anywhere on your website. Place it in a consistent location, such as the header or footer, so users know where to find it.
| Did you know that 76% of online shoppers prefer buying products with information in their native language? Maximize sales by making sure your language switcher is visible. |
Design a Language Switcher That Is Both Functional and Aligns with Your Site’s Design
Design the language switcher to be consistent with the overall look and feel of your website. Ensure that it complements your site’s color scheme and style as design consistency is key.
Select Only Relevant Languages for Your Audience
Avoid overwhelming users with a long list of languages, especially if they are unlikely to be used. Prioritize the most important languages and arrange them from the most visited to the least. Check your analytics to identify the source of your traffic and reorganize the dropdown menu accordingly.
Always Use Language Names
Display language names clearly and understandably. Avoid using flags alone, as they may not be universally understood, and some users may find them confusing. That’s the case for the Portuguese language spoken in Portugal and Brazil, always add the name of the language near the flag so users know what to expect.
WordPress Website Examples Using Our Language Switcher
Polylang has more than 800,000 active installations but we have selected three inspiring examples to show you several types of language switchers built with our plugin.
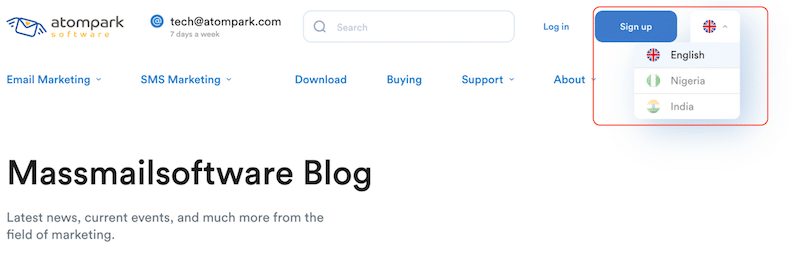
Client Project #1 – A Language Switcher With Custom Flags
Massmailsoftware is an international company specializing in software development, sales, marketing, and support. They are recognized as a Microsoft-certified partner, showcasing their commitment to excellence in technology and software solutions.
In their language switcher, they have one language, English, and two countries: Nigeria, and India, with custom-rounded flags. What makes it interesting is that they have used Polylang to target different countries, not languages (it’s kind of a multisite).
Client Project #2 – A Language Switcher Displaying One Language on a WooCommerce Site
GoudronBlanc is a French online store using the WooCommerce platform to sell high-quality t-shirts. They translated their site from French to English to get more international customers.
In their language switcher, they are using the “Hide the current language” feature, meaning that when users browse in English, they’ll only see the French button.

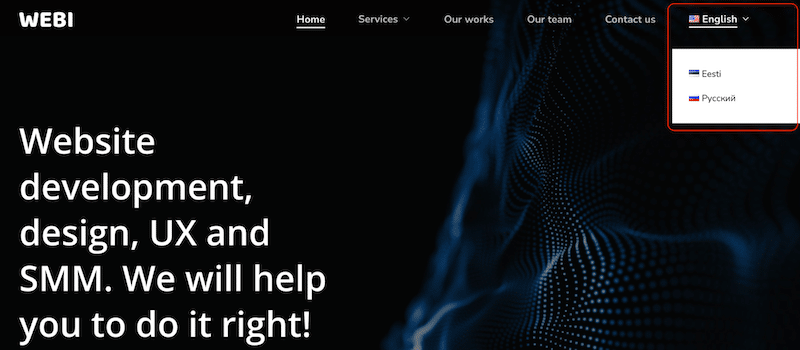
Client Project #3 – A Dropdown Language Switcher
Webib is a robust web agency specializing in website development, design, UX, and SMM from Tallinn, Estonia. Their site is available in 3 languages: English, Russian, and Estonian, allowing them to get more international projects. The language switcher is a dropdown menu which is perfect for a trilingual site.
Wrapping Up
Polylang stands out as one of the most convenient methods to add a language switcher anywhere on your WordPress site. You can have it in the header, in the navigation menu, in a widget, in a block, and even in the footer. Why not give Polylang a try? The best part is that you can achieve any parts of this tutorial for free, absolutely no risks taken, right? Download Polylang, translate your WordPress site, and add a language switcher to ensure seamless navigation for your international visitors!
If you are experiencing any issues on your WordPress site, we encourage you to visit our language switcher documentation.