


Most frequent searches:

Create menus
Polylang
Polylang Pro
Classic themes
1. Set up your existing menu
If your site already has a menu in its main language, there are two things to do: add a language switcher and assign the menu to the corresponding theme location.
Add a language switcher to your existing menu
- Under Add menu items, expand the Languages panel and add the Language Switcher to your menu. You can customize its display and behavior to suit your needs. See our Language Switcher documentation for all available options. Note: If the Languages panel is not visible under Add menu items, open Screen Options at the top of the page and enable Language switcher.
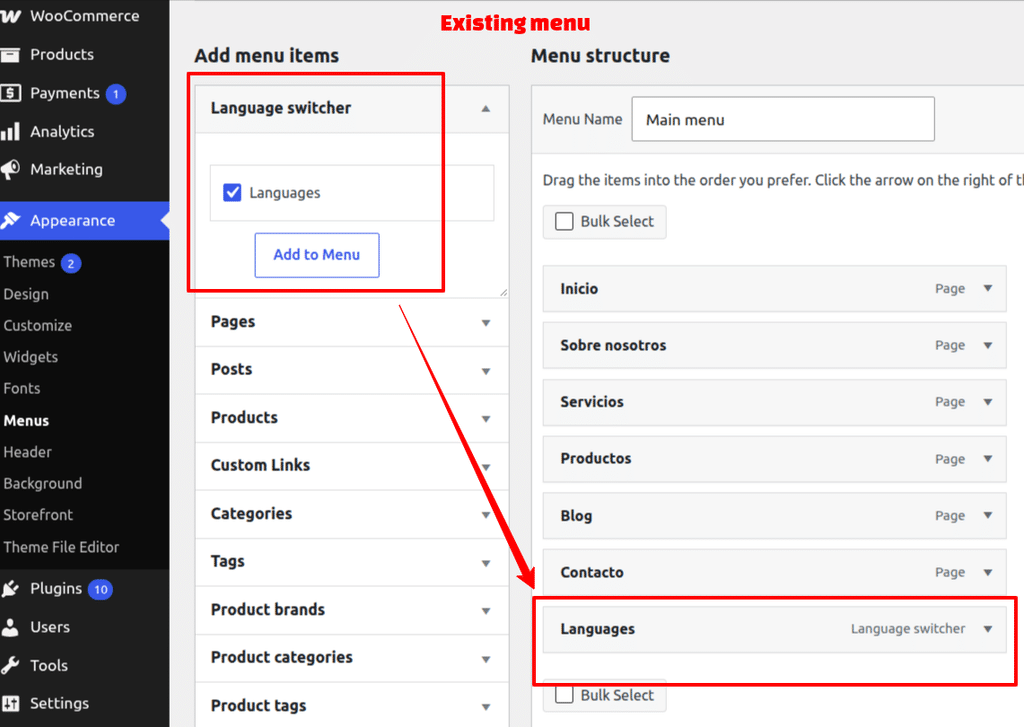
Assign your menu to a theme location
- In the Menu Settings > Menu location section, select the location corresponding to your menu’s language. For example, if your menu is in Spanish, select Primary Menu Spanish, as shown in the screenshot.
- Click Save Menu.
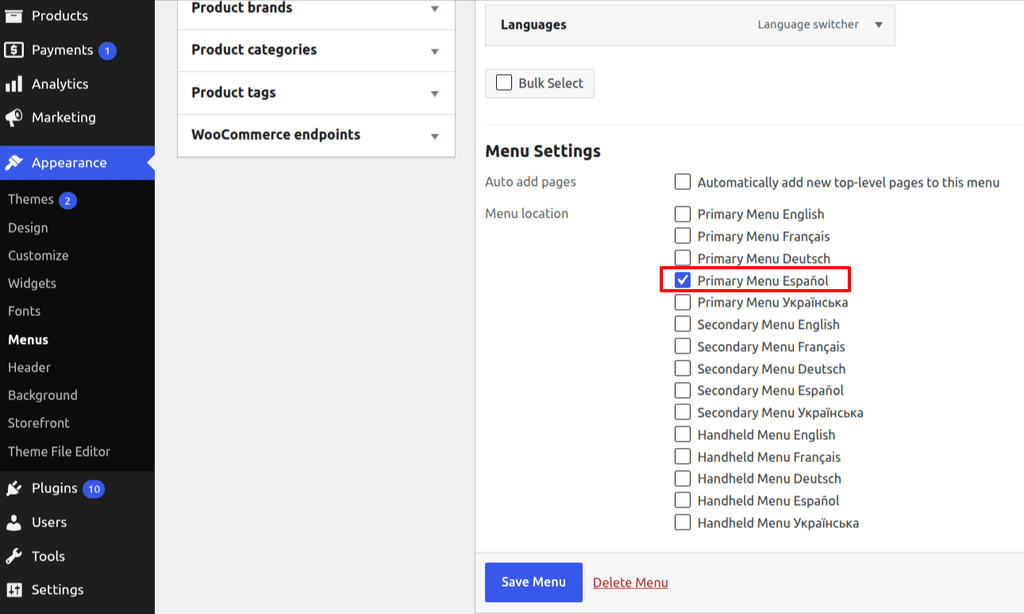
Your existing menu is now ready for multilingual navigation.
2. Create menus for your other languages
Before creating a menu for another language, make sure that the corresponding page translations have already been created.
You now need to create a separate menu for each of your other languages.
- Click Create a new menu and enter a name for your menu (for example, Main menu French).
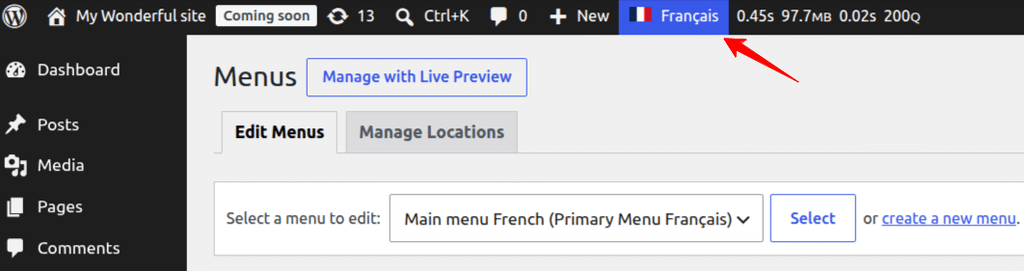
- Add the menu items (pages, categories, etc.) in the corresponding language. You can use the language filter as shown below in the WordPress admin bar to find content in the right language.
- In Menu Settings > Menu location, assign the menu to the corresponding theme location (for example, Primary Menu French).
- Click Save Menu.
Block themes
If you are using a block theme, menus are managed through the Site Editor (Appearance > Editor).
Refer to our How to make the navigation multilingual with the Site Editor guide for detailed instructions.