Polylang Pro 3.3 is coming soon with a brand-new, time-saving feature for you and your translators. Polylang Pro now supports XLIFF export/import for posts, pages, and media, meaning that you can export in a few clicks all your content that needs to be translated.
Before jumping to the short tutorial, let’s briefly overview the XLIFF format.
What Is XLIFF Format And Why You Need It
XLIFF is a format used to exchange localization data between stakeholders in a translation project. It stands for “XML Localization Interchange File Format”. XLIFF is an industry-wide standard for delivering text files to translators. In fact, thanks to this format, translators get only the actual content they need to proceed with the translation.
This is what a XLIFF file looks like. You can open it using a text editor like Note or Sublime Text.
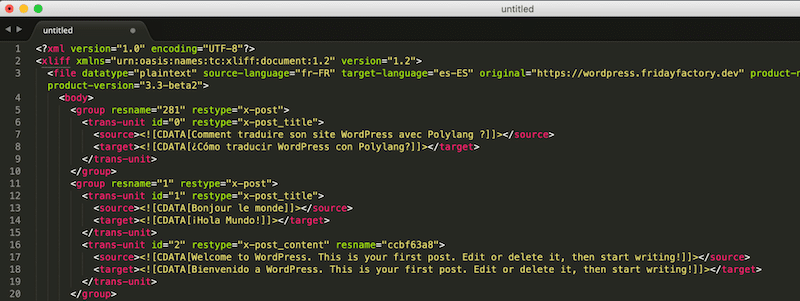
XML-based format ready for translation
XLIFF: A Game Changer For Your Translations
In this new version of Polylang Pro, you can generate your own XLIFF file by exporting the content to be translated in a few clicks. Then, you can send it to your translators or upload it to CAT tools like Matecat.
| Cat tools stand for Computer-assisted translation, they are translation software that helps translators translate content better and faster. |
Type of WordPress Content You Can Export To XLIFF
You can export your posts, pages, and media using this new XLIFF bulk functionality.
The content from Appearance > Widgets, and content from the Site Editor interface (previously Full Site Editing) cannot be exported at the moment.
How to Generate XLIFF Files to Translate your Content With Polylang Pro
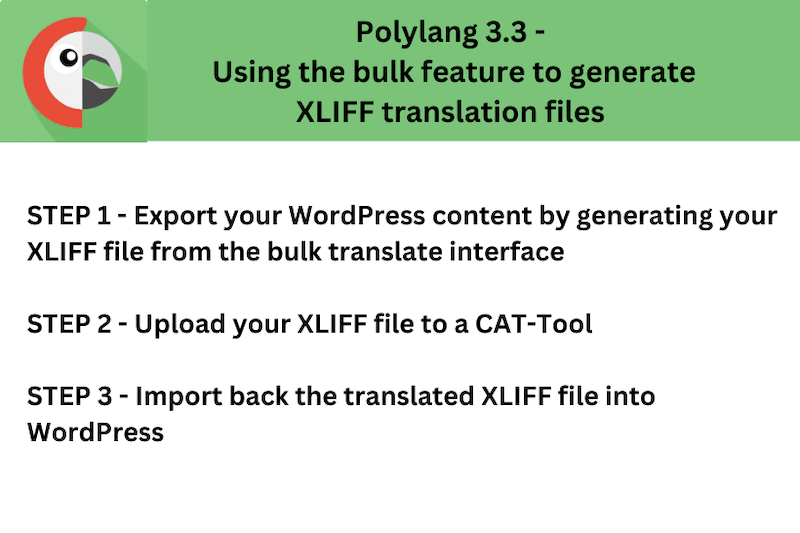
The whole bulk translation process can be divided into 3 main steps, namely:
Let’s go over each step.
STEP 1 – Export Your WordPress Content by Generating Your XLIFF File From the Bulk Translate Interface
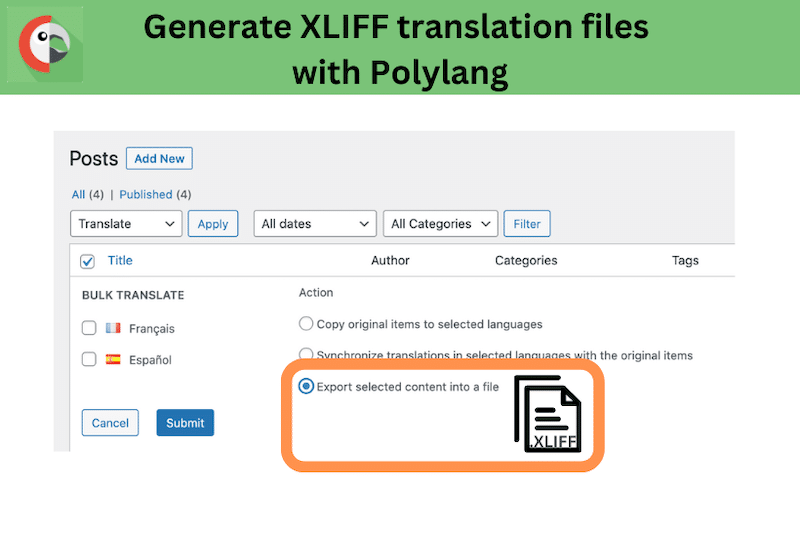
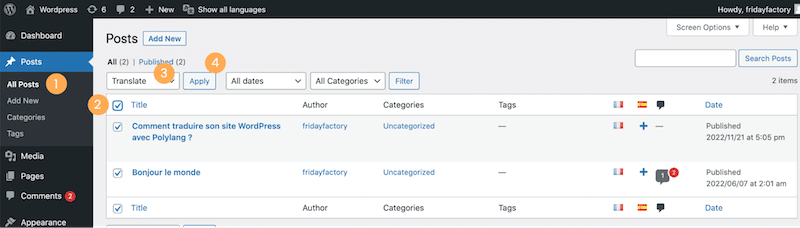
- From your WordPress dashboard, go to Posts > All Posts
- Select the posts that need to be translated
- In the dropdown menu of the bulk actions, select Translate
- Hit the Apply button
- Select the language(s) in which you want to translate your French posts (we select Spanish)
- Select the new option Export selected content into a file
- Click on the Submit button
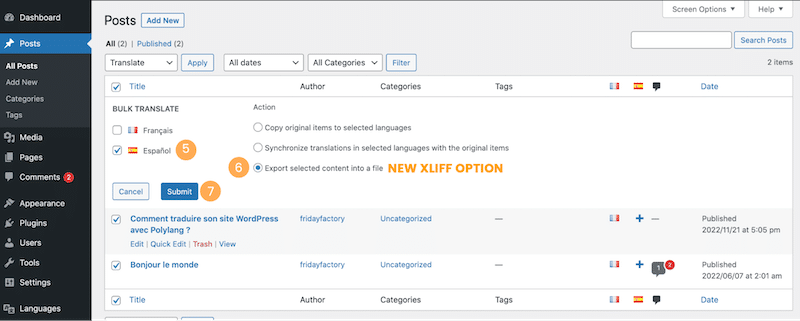
- A ZIP file is automatically generated and downloaded on your computer. Note: you will get in the ZIP file one XLIFF file per target language you have selected.
Now that your translation file (XLIFF file) is ready, you can proceed to their translation through a professional translator, or use CAT tools that allow you to translate this file format. That’s taking us to step 2.
STEP 2 – Upload Your XLIFF File to a CAT-Tool
In our case, we are using matecat.com.
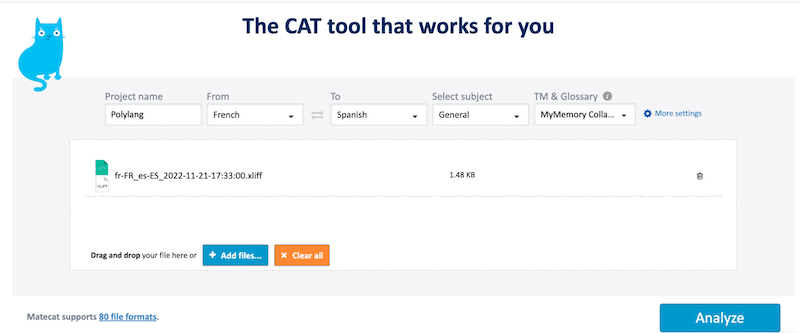
- Unzip your ZIP file and upload the XLIFF file
- Name your project (we named it Polylang)
- Select the origin language (French) along with the target language (Spanish)
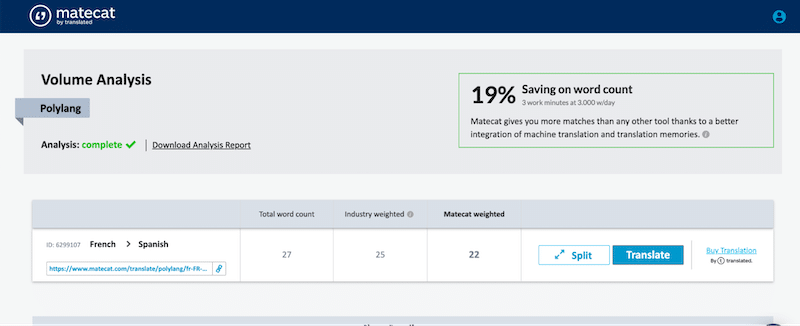
- Matecat gives you a complete analysis of your content:
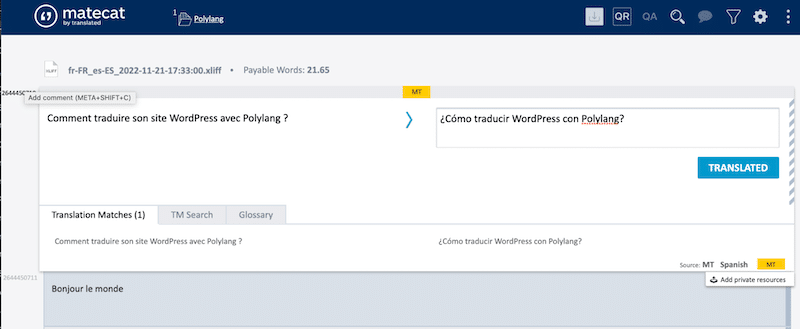
- Hit the Translate button
- Mark all the translation as Translated
Now that we have the translation file ready, let’s go back to our WordPress dashboard.
STEP 3 – Import Back the Translated XLIFF File into WordPress
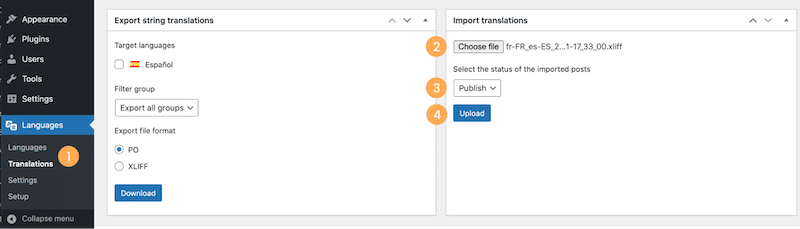
- Go to Languages > Translations (previously “Strings Translations”) and scroll down to Import translations metabox
- Upload your XLIFF file containing the spanish translation
- Choose the status of the imported posts: Publish or Draft
- Hit the Upload button
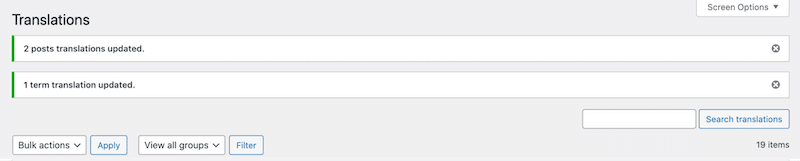
- Polylang informs you that new translated posts are available:
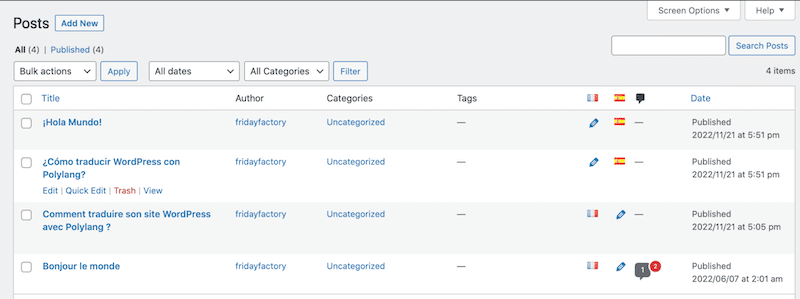
- Go back to your posts and check that the translated posts are well imported just like in our example below:
About Categories, Tags and Taxonomies
When exporting the XLIFF file, the system will detect if a translation exists for a category. When importing the XLIFF file, the translated category will also be imported along with the post.
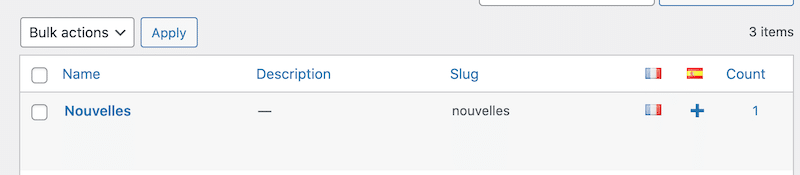
Before importing the XLIFF file, my category “Nouvelles” was not translated to Spanish:
After importing the XLIFF file, my category is now translated to Spanish:

To conclude, if the taxonomy in the original language is not translated, then the translation done by your translator will be imported. This action will create the category translation on-the-fly, accessible from the Category list. The Spanish posts will be automatically assigned to the translated category.
What Else Has Changed? New Name for the String Translations Panel!
Until version 3.3 of Polylang Pro, the main interface to translate the content of your WordPress site was called “String Translations”:
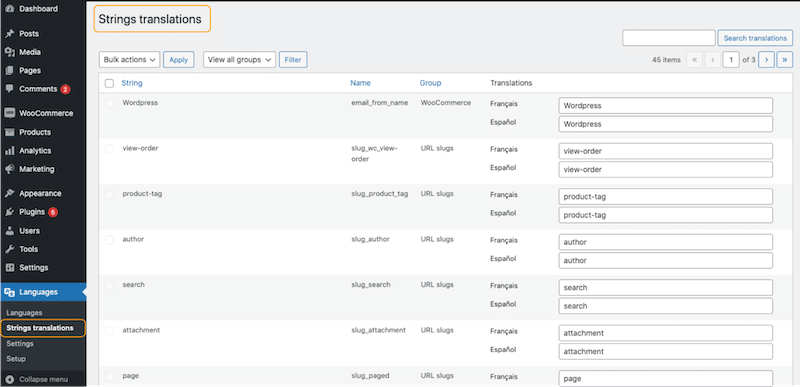
Previous String translations panel
In the new version, the interface is simply called “Translations”. You can follow the same path from the WordPress dashboard in order to access the panel, simply go to Languages > Translations:
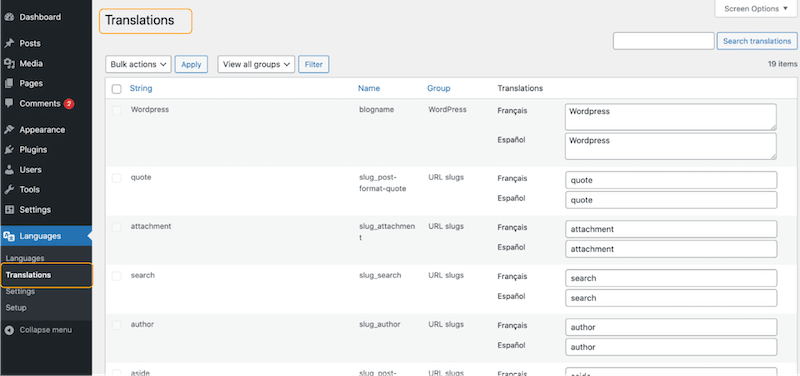
New Translations panel (Polylang 3.3)
Download the 3.3 beta version from your Polylang account and give it a try! If you have any questions or suggestions, please drop us a line. Your feedback is always helpful for our product team.