⚠️ Important Warning: Machine Translation DeepL doesn’t work with Elementor
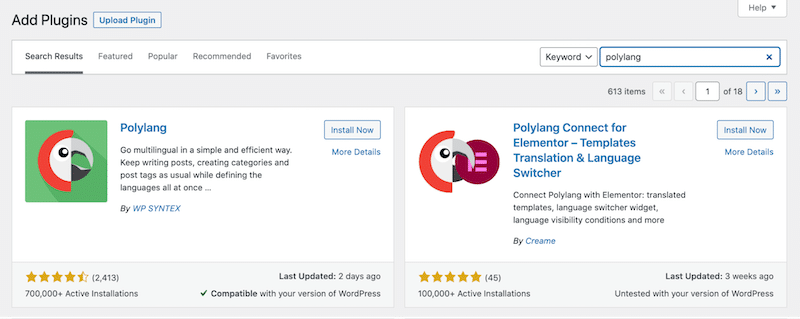
Do you need to translate your site built with Elementor? Polylang and Polylang Connect for Elementor can be one of the best options available out there! Technically, Polylang did not develop any specific compatibility with Elementor, the credit goes to the team behind the “Polylang Connect for Elementor” plugin. It’s a powerful tool that allows you to combine the most popular theme builder with one of the best multilingual solutions of the WordPress ecosystem. You can find the add-on directly on the WordPress repository which adds all the features and settings you need to translate your WordPress site designed with Elementor.
In this article, we explain how to make Elementor multilingual so you can start getting more international visitors as soon as possible. Let’s get you started!
| The team behind Polylang Connect for Elementor is crea.me, a web design agency that develops goal-oriented solutions with WordPress and WooCommerce to grow your business. Check them out if you ever need a serious (and multi-awarded) web agency! |
What You Need
- Polylang Connect for Elementor – a glue plugin that connects Polylang and Elementor. Thanks to this add-on, you’ll have all the essential options to translate Elementor.
- Polylang
- The Elementor page builder
- You’ll need Elementor Pro if you want to translate the following items:
- Elementor theme builder templates (header, footer, 404, page, archives).
- Elementor popups.
- Any dynamic tags that are additionally added by the plugin.
- If you have an e-commerce site built with WooCommerce:
- Polylang for WooCommerce – is a powerful add-on developed by Polylang that adds full support to translate every part of WooCommerce: products title, descriptions etc.
What You Can Translate With Polylang Connect for Elementor
- Elementor pages and widgets – there is a full integration with Elementor’s Editor meaning that the translation can be added directly to the page builder widgets.
- Elementor templates – you can translate them and show them in the right language for headers, footers, or any other archives template built with Elementor Pro Theme Builder.
- Shortcode detection – the plugin automatically selects the right shortcode in the correct language.
- Allow dynamic tags per language.
- Polylang links added to the Elementor Finder feature – very convenient!
- Custom language switcher – it comes with a dedicated widget available in the Elementor Editor which allows you to create an advanced switcher with your own design.
| Note: when you activate the plugin there will be no dedicated settings page as everything works under the hood. |
Translate a Page Built With Elementor’s Widgets
Thanks to the glue plugin, there is a great integration between Elementor and Polylang. As a result, you can add and edit your translations directly from Elementor Editor.
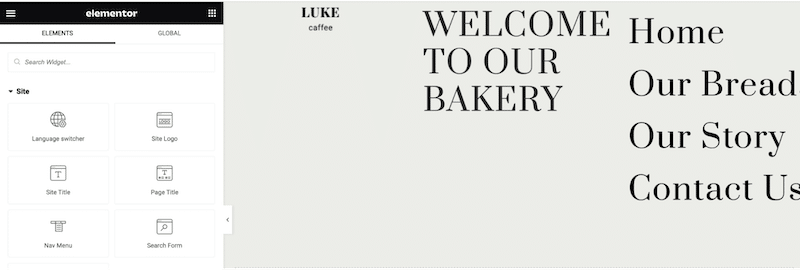
For our tutorial, we have created a test site for a bakery in London that will be available in both English and French. This is what my test site looks like in English:

To translate a page built with Elementor, follow the steps below:
- Make sure to set up Polylang with at least 2 languages. We have chosen English (primary) and French (secondary) for our tutorial.
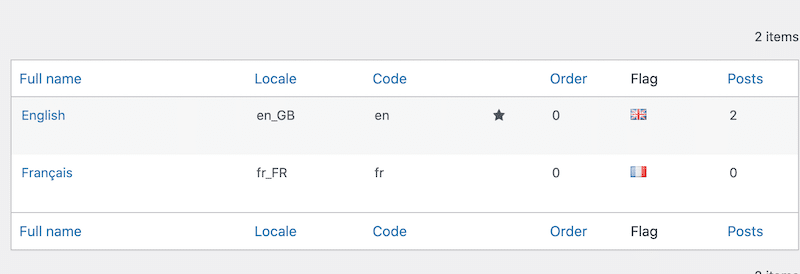
Our two chosen languages
| Need help with the full setup of Polylang? Check our getting started guide. |
- Then navigate to Pages > All pages and click on one of the + under the French flag to proceed with the translation. We start with the homepage.
The “+” button to add the translation of a specific page
- Click on the “Edit with Elementor” button to launch the page builder and start the French translation.
Launching Elementor builder to do the translation
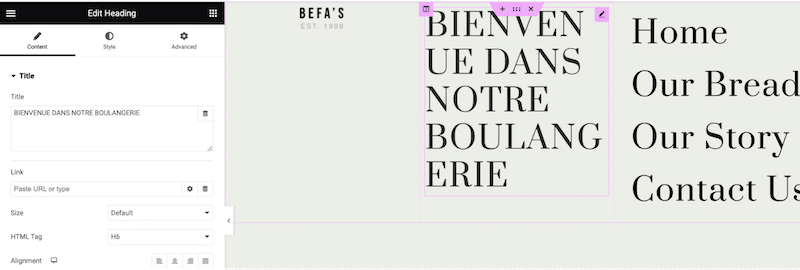
- Replace the content with your target language (French for us) directly from the Elementor page builder:
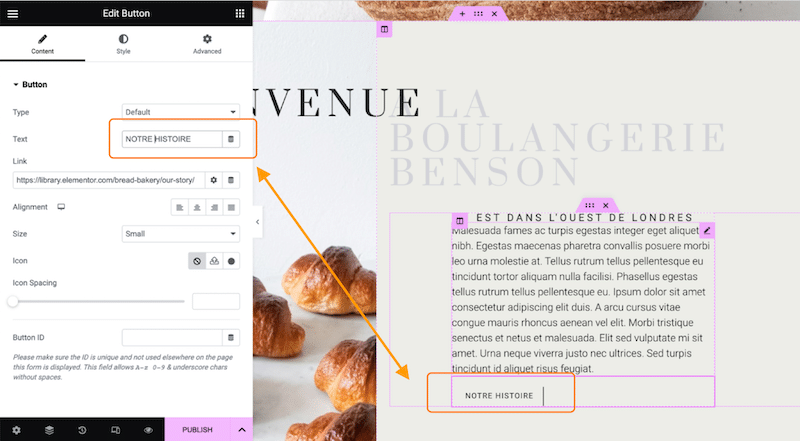
Replacing the content in English to French
- Press the PUBLISH button:
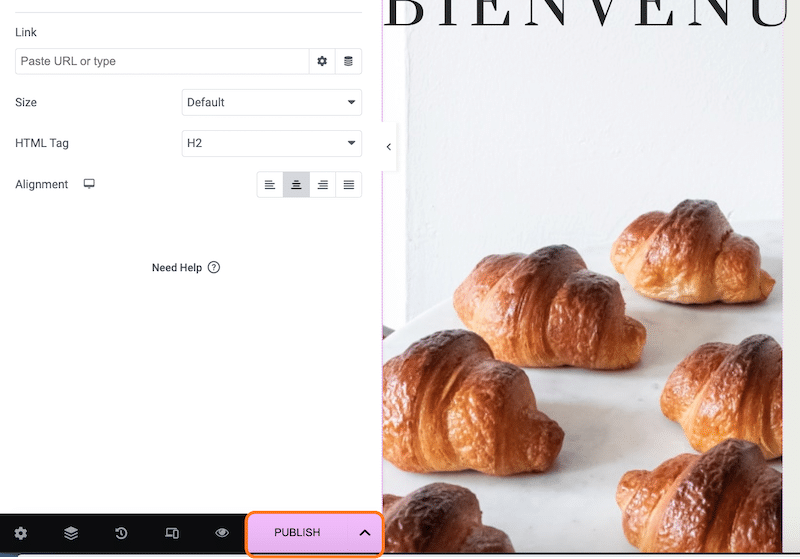
The “Publish” button on Elementor Page Builder
- The homepage is now translated into French:

The French version of my website
Translate Custom Templates Built With Elementor Pro Theme Builder
All you need to do is translate the template into the secondary languages of your choice. Polylang Connect for Elementor will apply the settings automatically to display the correct templates according to the language selected by the user.
Translate Your Custom Header or Footer
In our example, we are building a custom header and we will show you the steps to follow for the translation and how to add display conditions.
- Create a custom header using Elementor Pro Theme Builder.
My custom header (EN)
- Add a display condition from your primary language (EN), if needed. We are adding our header to the entire site:
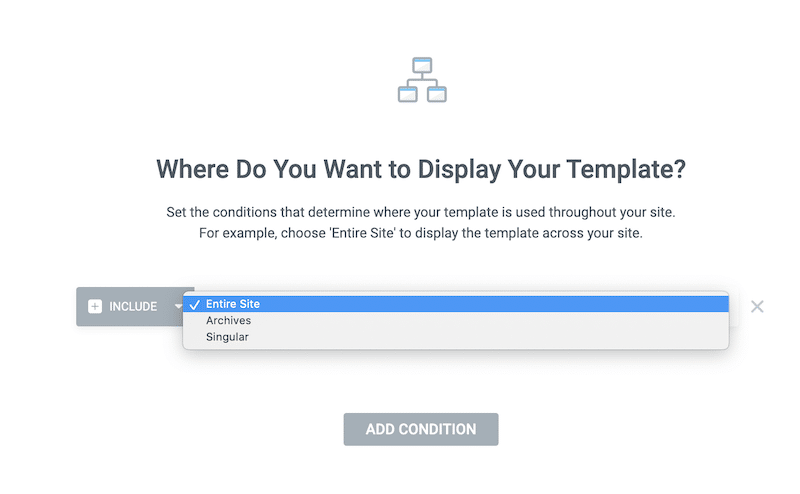
Adding display condition on the primary language
| ⚠️Important: when you manage translated templates, we recommend you create linked translations and only set display conditions on the default (primary) language – which is English in our example. |
- Publish it by hitting the PUBLISHING button on the Elementor Editor.
- Go to the Elementor Editor settings, and you will now see a LANGUAGES box featured by the Polylang Connect for Elementor plugin:
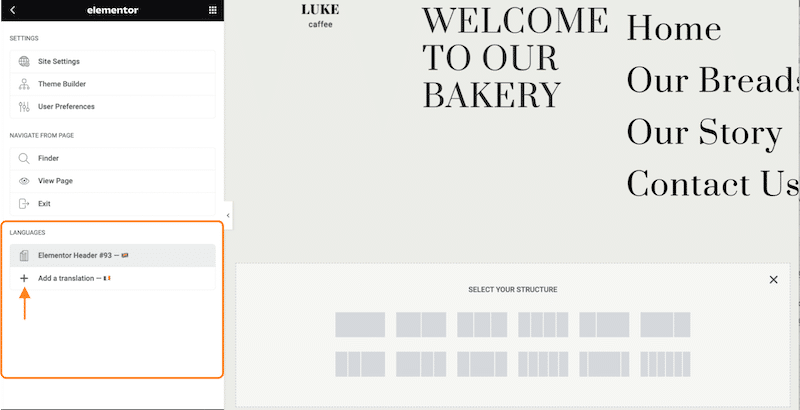
- Click on the + to translate your custom header. We are now adding the French version.
- Publish the page and launch the Elementor Builder by clicking on the “Edit with Elementor” button
- Add your translation. Note that you can also change the logo if you have a translated version and want to use another image:
- Optional step – if you haven’t translated your navigation menu yet. You can’t translate your menu from Elementor, you need to create one menu per language. Go to Appearance > Menu and create a new menu in French, add your custom page URL for each section and select “Header Français”:
Choosing where to display the translated menu to FR
- Don’t apply any conditions in the secondary language.
- That’s it! Both headers will be displayed in the correct language automatically:
There is another way to translate Elementor templates from the WordPress admin if you already have created your custom header or footer. Go to Templates > Saved Templates > and click on the + button:
Translating templates coming from Elementor Saved Templates list
Before launching Elementor, remember to rename your template and hit the publish button.
Translate WooCommerce Product Template Built with Elementor
The steps are the same as for the header (please refer to the previous step). Simply go to your templates and add the French version. To translate the content of your products such as the product name and description, you’ll need the Polylang for WooCommerce plugin.
| Need help with WooCommerce translations? We wrote a full tutorial about how to translate your WooCommerce site with Polylang. |
Create a Custom Language Switcher Using Elementor Editor
Thanks to Polylang Connect for Elementor, you can create your own language switcher directly from the Elementor editor. You’ll find a native Elementor widget to easily build a fully customizable switcher. Here’s what you can do:
- Show/hide flags, language name, and language code
- Horizontal list, vertical list, or dropdown
- SVG scalable flags
- Language visibility conditions: to show or hide every widget, section, or column according to the language of the page
- Customize the look-and-feel of the switcher (colors, layout, size etc.)
To design your own language switcher, go to the page in the primary language (EN) and launch Elementor.
- Search for the “Language Switcher” widget:
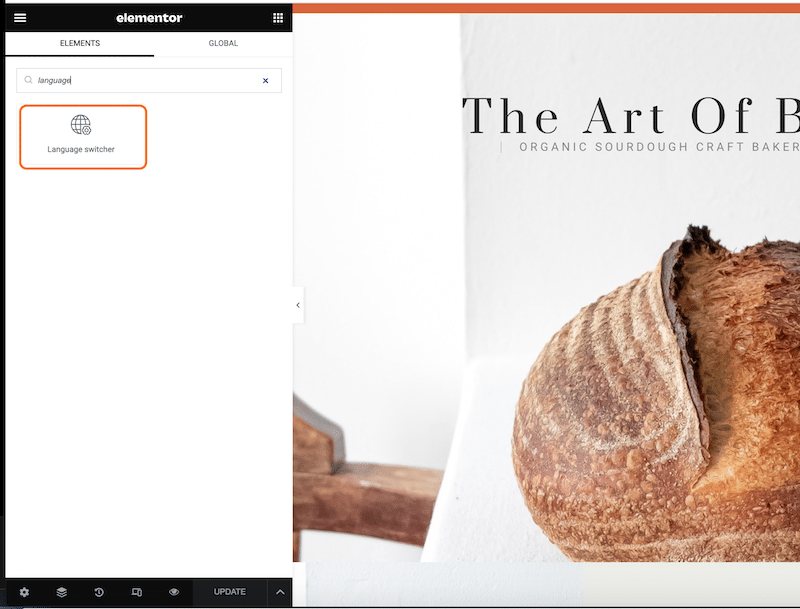
Language switcher widget from Elementor
- Start to customize it and select the layout, alignment, and the other options of your choice as shown below:
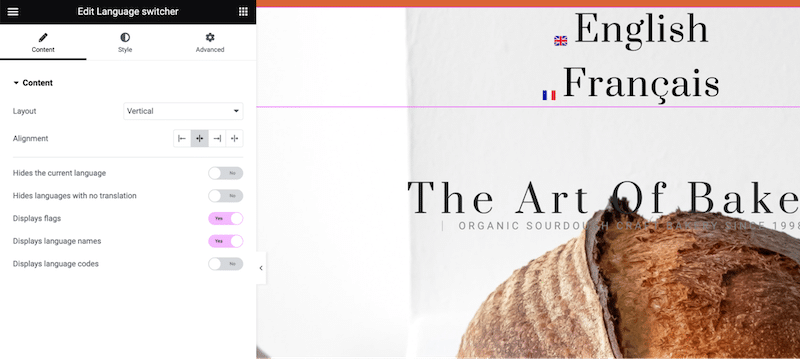
Language switcher widget options (content)
- Style it using the Style and Advanced tabs:
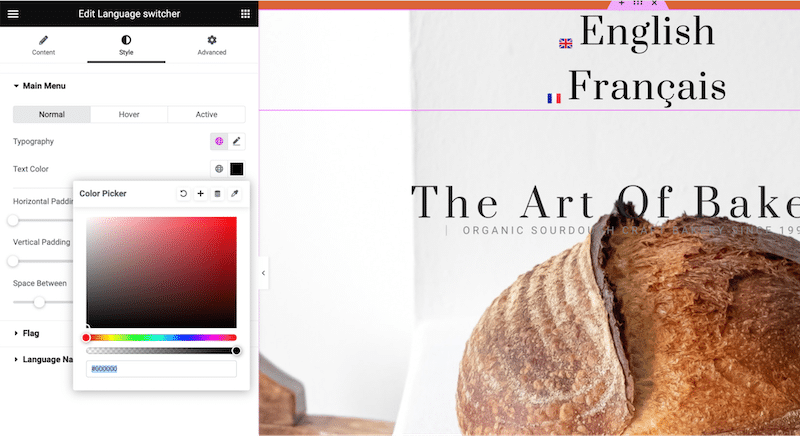
Language switcher widget options (style)
- For example, you can select the colors, add some space between the languages and modify the size of the flags:
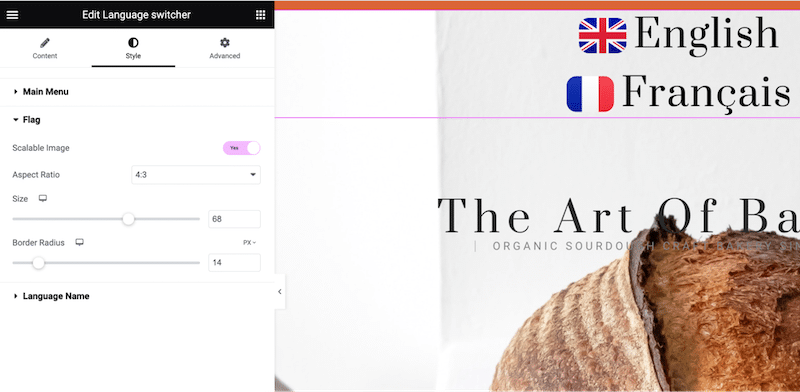
My custom language switcher designed in the Elementor Editor
Known Issues for Multidomains WordPress Sites Built With Elementor
Elementor does not accept cross-domain requests on multidomain sites. The solution would be to use directories instead of multidomain (different domains).
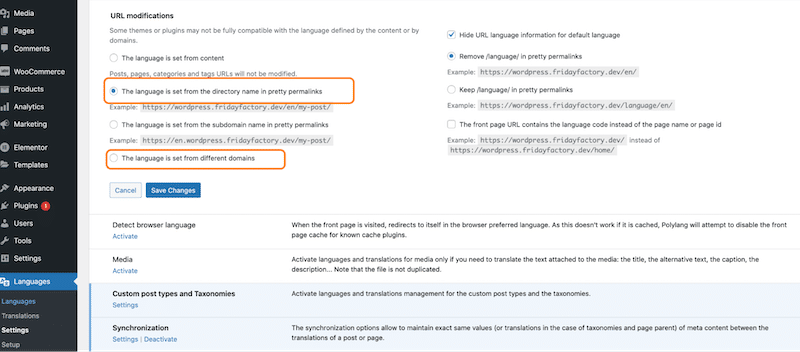
If you absolutely want to use different domain, then Polylang Connect Elementor offers a workaround: it “forces” the connection on the login page to the secondary domain. In plain English, you need to log in again to add the translation.
For example, let’s say that my multidomain site has the following settings:
mysite-en => the primary domain
mysite-fr => secondary domain
mysite-de => secondary domain
Now if I go to my list of posts and start to edit anything, this is what happens:
- If I edit the post in my primary language → Everything goes well because it is the main domain. I can access the post as shown in the screenshot below:
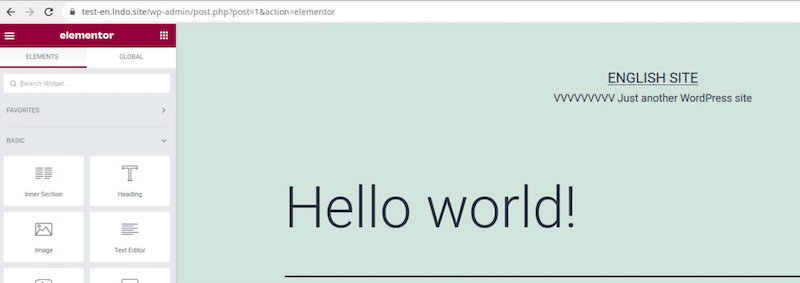
Editing my post normally with the primary language
- If I edit the post in my secondary language → Polylang Connect for Elementor redirects me to the login page to connect to this domain. Once I’m connected, I can edit my Hello FR post without any problem, but I need to log in again.
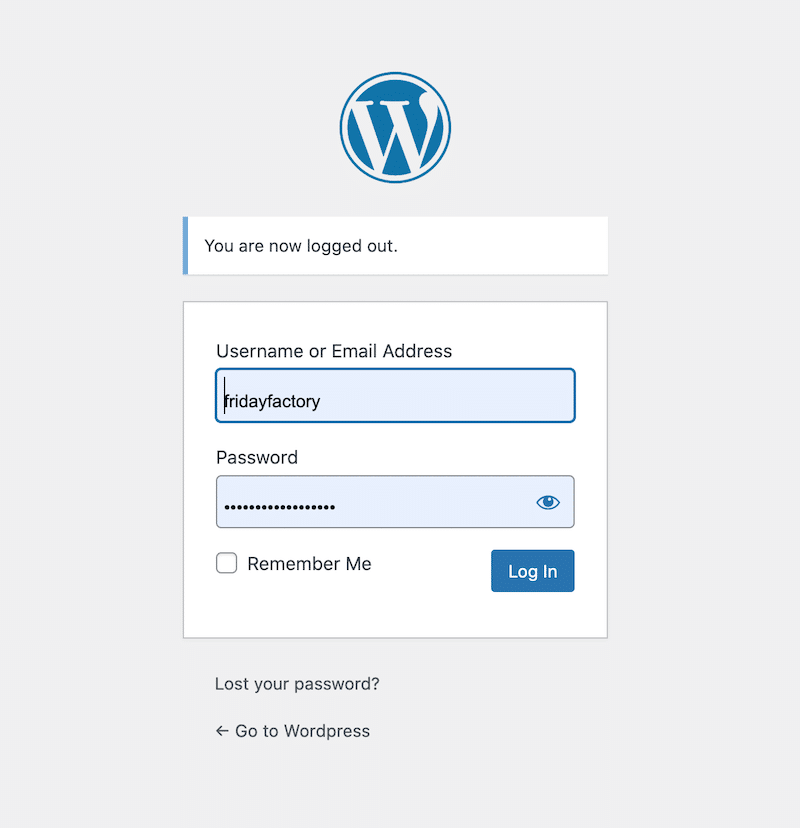
Redirection to the login page when trying to edit a post in a secondary language is my setup is “multidomains”
NB: The login connection on the secondary domains happens only once, no need to go through the login form again to modify a post or a page in another secondary language. For our example, once the log-in/log-out story happened for the French version, it won’t happen for the German one.
Wrapping Up
And that’s it! In a few steps, we have built a multilingual site with Elementor, Polylang, and Polylang Connect for Elementor. Everything also works with WooCommerce so if you have an e-commerce site and want to start selling abroad, go multilingual
❤️ If you love using Polylang Connect for Elementor created by crea.me, you can show it by making a donation here.
⚠️ Important Warning: Machine Translation DeepL doesn’t work with Elementor