Working with ACF Pro
Polylang Pro
⚠️ Important: Polylang Pro 3.7 brings a complete rewrite of the ACF integration. This documentation reflects the new approach.
The compatibility with ACF Pro is provided by Polylang Pro. This integration is available for post types, taxonomies, and ACF blocks. There is also an integration to work with option pages contributed by the Be API Agency: 👉 ACF Options for Polylang
What’s New in Polylang Pro 3.7
Field groups are no longer translatable. This means:
- The “Field Groups” checkbox is no longer available in the Custom Post Types and Taxonomies module as shown below.
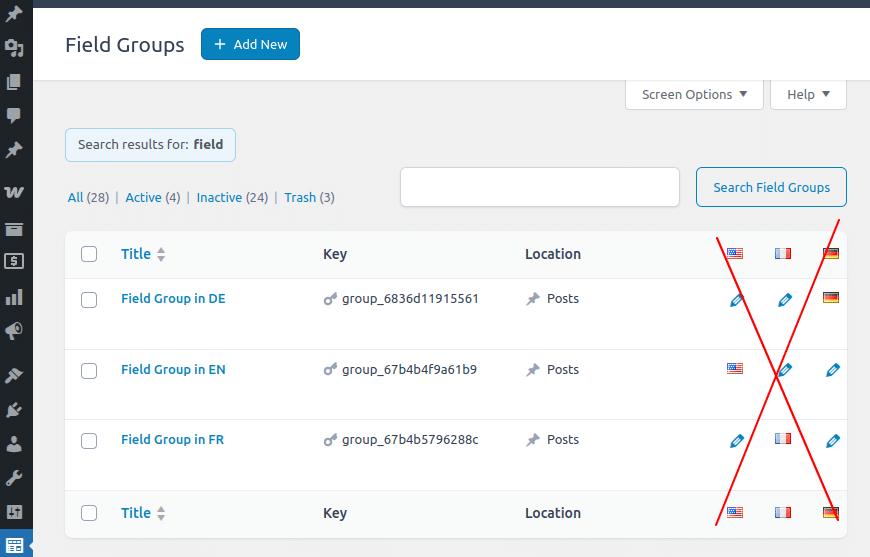
- The language column and translation metabox that were previously visible when editing a field group have been removed.
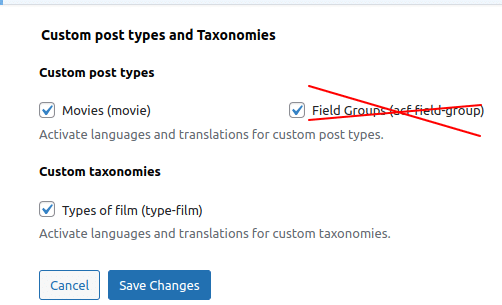
The Custom Post Types and Taxonomies module found in Polylang’s settings under Languages > Settings
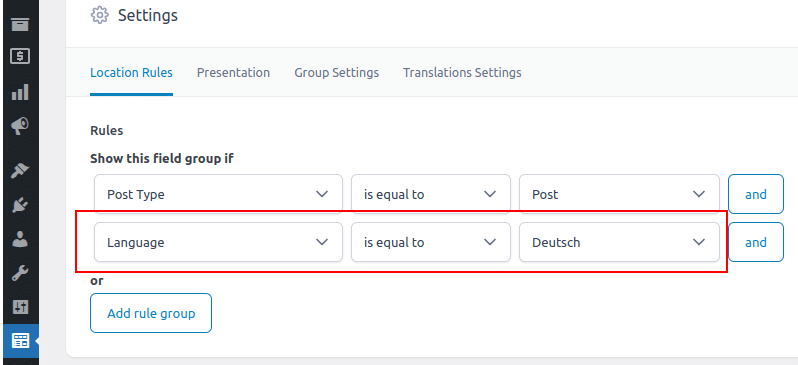
- If you still wish to have language-specific field groups, you can assign language-based display rules (e.g. “Show this field group if language = German”).
- Use the Translations table to translate all translatable content — such as labels, instructions, and default values — in Languages > Translations > ACF group.
- Introducing the “Translate Once” Feature: a new setting called Translate once is now available to simplify field translation workflows. This feature is explained in a later section of this documentation.
- ACF Blocks, Custom Post Types, and Taxonomies: the integration also fully supports:
- ACF blocks, including automatic translation with DeepL and XLIFF export/import
- Custom post types
- Custom taxonomies

1. Creating Multilingual Field Groups with Polylang Pro 3.7
This section applies to Polylang Pro starting from version 3.7, and only when you create new field groups from scratch using this version.
If your field groups were created with an earlier version of Polylang, the behavior may differ, as those groups might not follow the same multilingual logic introduced in 3.7. This is explained later in the ℹ️ information box titled “Legacy behavior for field groups created before Polylang 3.7”.
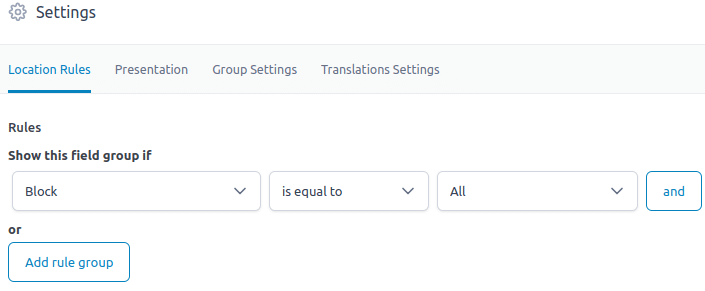
1.1 Using Language Location Rules
To display a field group only for specific languages, you can now use the new Language location rule:
1. Go to ACF > Field Groups
2. Edit your field group
3. In the Location section, add a new rule:
– Show this field group if → Language → is equal to → [Your Language] This replaces the old method of translating entire field groups.
As a result, the “Translations” options for each field (synchronize, copy once, ignore, translate) are no longer displayed in the field settings. This is intentional, because if a field group is assigned to a specific language, there’s no longer any translation or synchronization to manage — the fields exist only in that one language.
However, if your translated Field Groups were created before version 3.7, the synchronization, copy once, etc., behavior still works exactly as before — even though the options are no longer visible in the UI. Fields that were set to “synchronize” prior to the update will continue to synchronize as expected — nothing has been reset.
| ℹ️ Legacy behavior for field groups created before Polylang 3.7 However, if your translated Field Groups were created before version 3.7, the synchronization, copy once, etc., behavior still works exactly as before — even though the options are no longer visible in the UI. Fields that were set to “synchronize” prior to the update will continue to synchronize as expected — nothing has been reset. |
⚠️ Important:
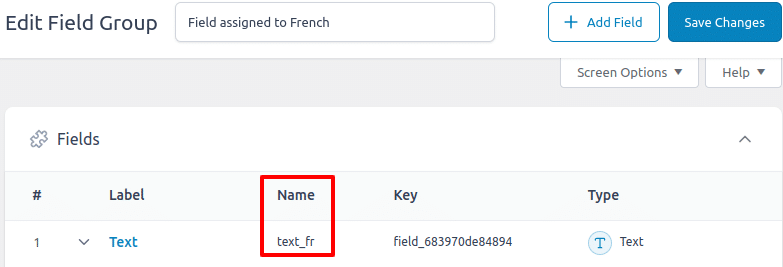
To ensure that field groups assigned to different languages remain truly independent and avoid unexpected behavior, make sure that each field has a unique “Name”.
For example, in your English field group, if you have a field labeled “Text,” its Name (e.g. text_en) should be different from the one used in the French field group (e.g. texte_fr).
This prevents conflicts or cross-language data overlap between fields that appear similar but are meant to be distinct. Here an example:

1.2 Translating Field Labels and Instructions
Since field groups are no longer translatable, you’ll need to translate labels and instructions using Polylang’s string translation feature:
1. Go to Languages > Translations table
2. Look for strings in the ACF group
3. Translate field labels, instructions, and other text elements
The system automatically registers all field labels for translation when you create or update field groups.
1.3 Managing Translation Instructions Display
Polylang Pro automatically displays helpful translation instructions below each field (like “This field is translated” or “This field is copied once”) to help you understand how each field behaves during translation.
You can control whether these instructions are displayed:
1. Go to ACF > Field Groups
2. Edit your field group
3. Click on the Translations Settings tab
4. Toggle Display translation field instructions on or off

Note: Translation instructions are enabled by default. When disabled, the translation behavior settings still work the same way, but the helpful instruction text won’t be displayed in the field editor.
2. Configuring Field Translation Behavior
Each field in your field groups can be configured with one of five translation behaviors:
2.1 Ignore
When creating a new translation, this field will be left blank in the newly created translation.
2.2 Copy Once
The field value is copied from the source when creating a translation, but won’t be updated if the source changes later. This is ideal for:
– Images and media files
– Post relationships
– Taxonomy selections
– Page links
Polylang automatically finds translated versions of linked content when available.
2.3 Translate
The field is copied during translation creation and is expected to be manually translated afterward. This option is available for text-based fields:
– Text
– Textarea
– WYSIWYG editor
– oEmbed
– URL
Fields marked as Translate can be:
– Automatically translated using services like DeepL,
– Exported and imported via XLIFF files.
2.4 Translate Once (New in 3.7)
Similar to “Translate,” but the field will only be translated once. If the field already has a translated value, it won’t be overwritten during import translation processes. This is useful when you want to:
– Provide an initial translation
– Prevent accidental overwrites of manually edited translations
– Maintain control over specific field translations
Like the Translate behavior, fields marked as Translate Once can also be:
– Automatically translated with DeepL,
– Exported and imported via XLIFF.
🧠 Understanding the Difference Between Translate and Translate Once
Translate and Translate Once share the exact same behavior when a translation is created, making these settings hard to differentiate at first glance. But once the translation is created, these settings become useful when different update strategies are needed.
For example, if you’ve translated a post with two text fields—one set to Translate and the other to Translate Once—the latter will no longer be exported in XLIFF, unlike the field set to Translate, which will always be exported. Note that this has no impact on DeepL, as no smart update feature exists yet.
| Behavior | Copied when creating translation | You can translate manually | You can translate with DeepL | Included in XLIFF export when creating post’s translation | Included in XLIFF export once posts are translated | Synchronization Layout ℹ️ |
|---|---|---|---|---|---|---|
| Translate | ✅ Yes | ✅ Yes | ✅ Yes | ✅ Yes | ✅ Yes | ✅ Yes |
| Translate Once | ✅ Yes | ✅ Yes | ✅ Yes | ✅ Yes | ❌ No | ❌ No |
ℹ️ Another important benefit of Translate Once is to prevent synchronization and layout subfield overrides. When layout subfields are set to Translate Once (for example, inside a Repeater), they will be translated as usual when creating the translation. However, if any subfield is added, updated, or removed afterward, the translated post will no longer be affected. In contrast, with subfields set to Translate, any structural change to the layout will be synchronized across all languages.
2.5 Synchronize
Changes made to this field in any language will automatically update all translations. This works differently based on the field type:
For fields with translatable content (images, posts, terms, etc.):
– If you change a post relationship in English, the French translation will automatically update to the corresponding French post

For fields with non-translatable content (text, numbers, etc.):
– The exact same value will be copied to all translations
3. Working with Layout Fields
Layout fields (Repeater, Flexible Content, Group) don’t have their own translation settings. Instead, their behavior is determined by their sub-fields:
3.1 Synchronized Structure
To keep the layout structure synchronized across all translations:
– Set at least one sub-field to **Translate** or **Synchronize**
– Adding or removing layout elements will affect all translations
3.2 Independent Structure
To allow different layout structures for each language:
– Set all sub-fields to Ignore, Translate Once or Copy Once
– Each translation can have its own unique layout structure
4. Working with ACF Blocks
ACF blocks and their related fields are managed in the same way as classic fields described above.
The field translation settings work identically for ACF blocks as they do for traditional field groups. However, there is one important limitation: synchronization does not work for ACF blocks. While you can set fields to Synchronize, changes made to synchronized fields within ACF blocks will not automatically update across translations. For ACF blocks, it’s recommended to use Copy Once, Translate, or Translate Once instead of Synchronize to ensure predictable behavior.
5. Migration from Earlier Versions
If you’re upgrading from Polylang Pro 3.6 or earlier:
1. Existing translated field groups will be automatically migrated
2. Each translated field group will be converted to use the new Language location rule
3. Field group translations will be removed from the translation system
4. Your field data and settings will be preserved
6. Best Practices
6.1 Planning Your Field Groups
– Create one field group per content type/purpose
– Use Language location rules only when you need different fields for different languages
– For most cases, a single field group with proper field translation settings works best
6.2 Field Translation Settings
– Use Copy Once for media, relationships, and structural data
– Use Translate for content that should be manually translated
– Use Translate Once for content that needs initial translation but shouldn’t be overwritten
– Use Synchronize sparingly, only for data that should truly be identical across languages
– Use Ignore for fields that are language-specific and shouldn’t be copied
6.3 String Translations
– Regularly check Languages > String translations for new ACF strings
– Translate field labels and instructions to provide a consistent multilingual experience
– Group related translations for easier management
7. Troubleshooting
Q: My field groups aren’t showing up in certain languages
A: Check if you have Language location rules that might be filtering the field group. Remove or adjust these rules as needed.
Q: Field labels aren’t translated
A: Go to Languages > String translations and look for ACF strings. Make sure to translate all relevant labels and instructions.
Q: Changes to one language aren’t syncing to others
A: Check your field translation settings. Only fields set to Synchronize will automatically update across translations.
Q: My layout fields aren’t behaving as expected
A: Remember that layout field behavior is controlled by their sub-fields. Check the translation settings of all sub-fields within your repeater or flexible content fields.
Q: I don’t see translation instructions below my fields
A: Check if translation instructions are enabled for your field group. Go to Custom Fields > Field Groups, edit your field group, click the Translations Settings tab, and make sure Display translation field instructions is enabled.