How to translate options with a wpml-config.xml file?
Polylang
Polylang Pro
Introduction
The wpml-config.xml file is a powerful tool which allows to add WordPress themes and plugins options to the string translations.
This tutorial explains how to find the information to add in this file to translate option strings easily.
Prerequisite
To follow this tutorial you’ll need a PhpMyAdmin access to find how options are stored and named. We suggest you to test it in a development environment before using it on your production website.
If you are not sure about your ability to manage this tutorial, do not hesitate to contact us in our Polylang Pro help desk.
Warning
In this tutorial, we’ll access to PhpMyAdmin which is a tool to manage databases. A wrong manipulation of data may break your website.
Always make a database backup before manipulating it.
Adding a simple option in the wpml-config.xml
To illustrate we’ll use the plugin WooCommerce. Thanks to Polylang for WooCommerce you’ll be able to send emails to your customer in the language they purchased.
That said, you may want to translate the email sender options in each language that you have in your website:
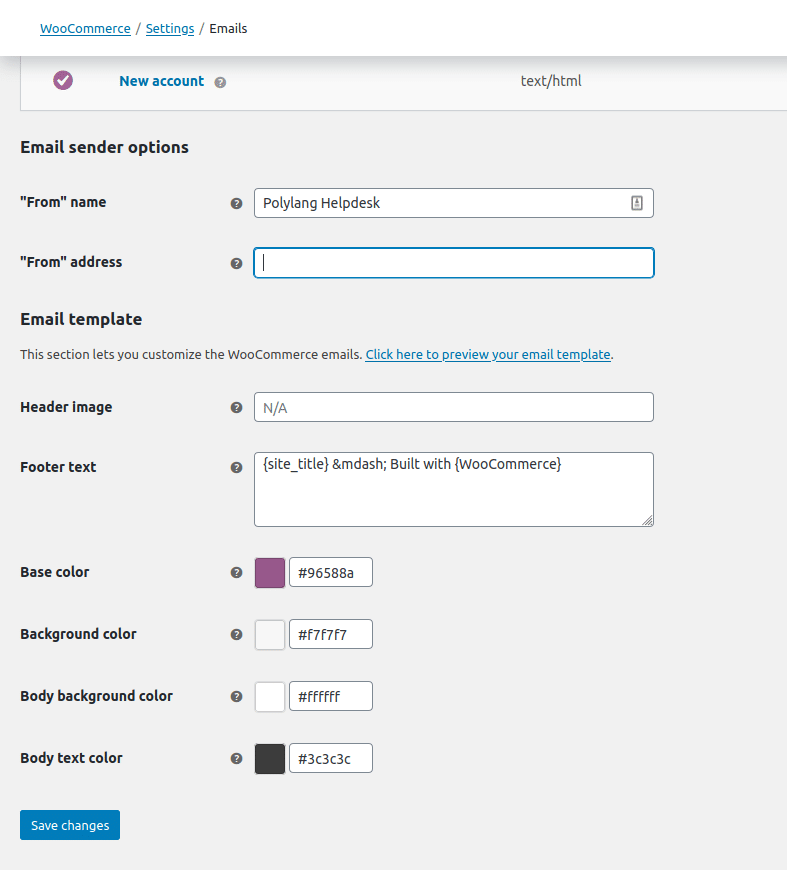
Now our goal is to find how WooCommerce stores these options and which names it uses.
- Fill each fields and save the options, to store them in the database.
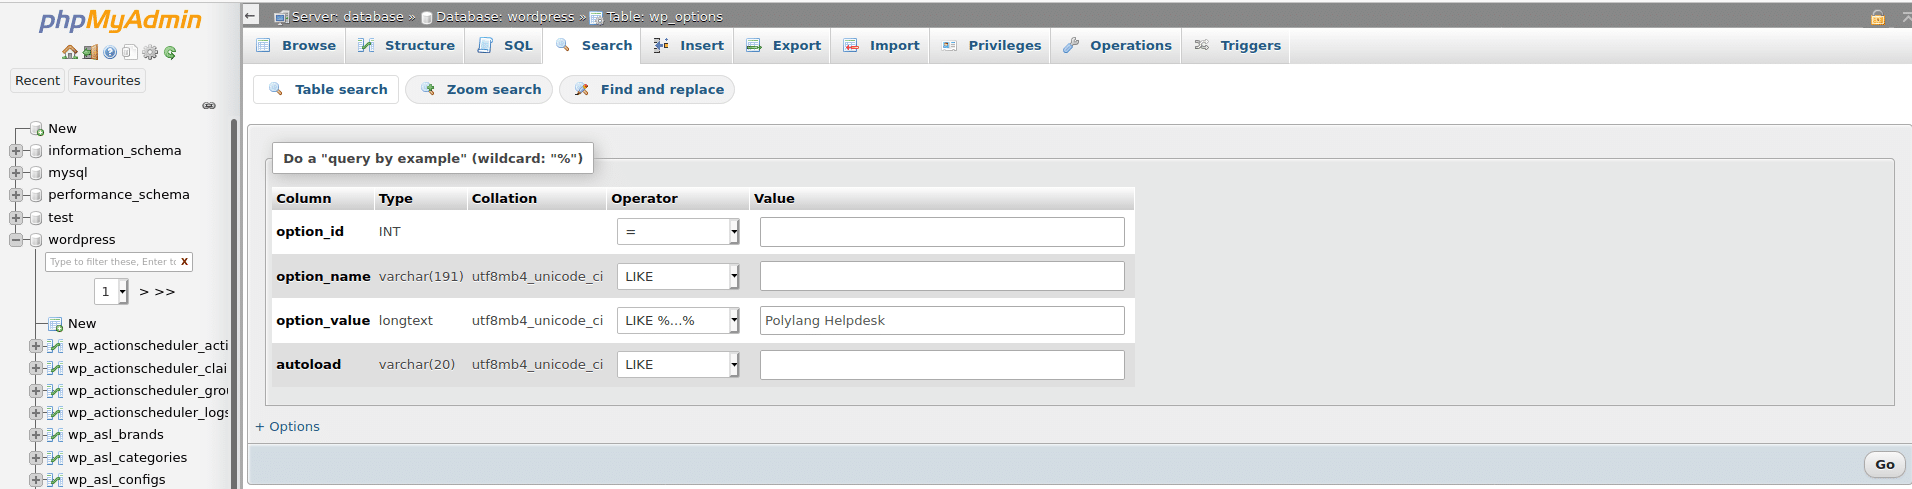
- Open PhpMyAdmin and go to the wp_options table
- click on “Search” tab

- Fill the search fields with:
- “Option value” selected on “LIKE %…%”. The % sign will allows to hav characters before and after the searched string.
- Paste the value on the searched option: “Polylang Helpdesk” in our case.
- Click on “Execute”
- You should have something like:

- The info needed here is “woocommerce_email_from_name”. Copy the data (Do not cut).

Writing the wpml-config.xml file
In your preferred text editor, add the code below in a new file called wpml-config.xml:
<wpml-config>
    <admin-texts>
        <key name="woocommerce_email_from_name" />
    </admin-texts>
</wpml-config><wpml-config>must be the first tag in your wpml-config.xml file, and</wpml-config>must be the last one. Polylang will only process instructions between these tags.<admin-texts> ... </admin-texts>will contain the options we want to translate.<key name="woocommerce_email_from_name" />Adds a simple option (not serialized) to our string translation. The name ‘woocommerce_email_from_name’ is the option name found earlier in PhpMyAdmin.
Of course, you can have several <key name="{option_name}"/> inside your admin-texts section.
Adding a serialized option in the wpml-config.xml
Some themes or plugins are storing an array of options in the same option key in the database. WordPress serializes the data to store them correctly.
To illustrate this chapter, we’ll use the plugin WPFront Notification Bar. This plugin allows to spread a message in a bar in your front-end website. In the settings of this plugin, you’ll find several textareas and input fields for text.
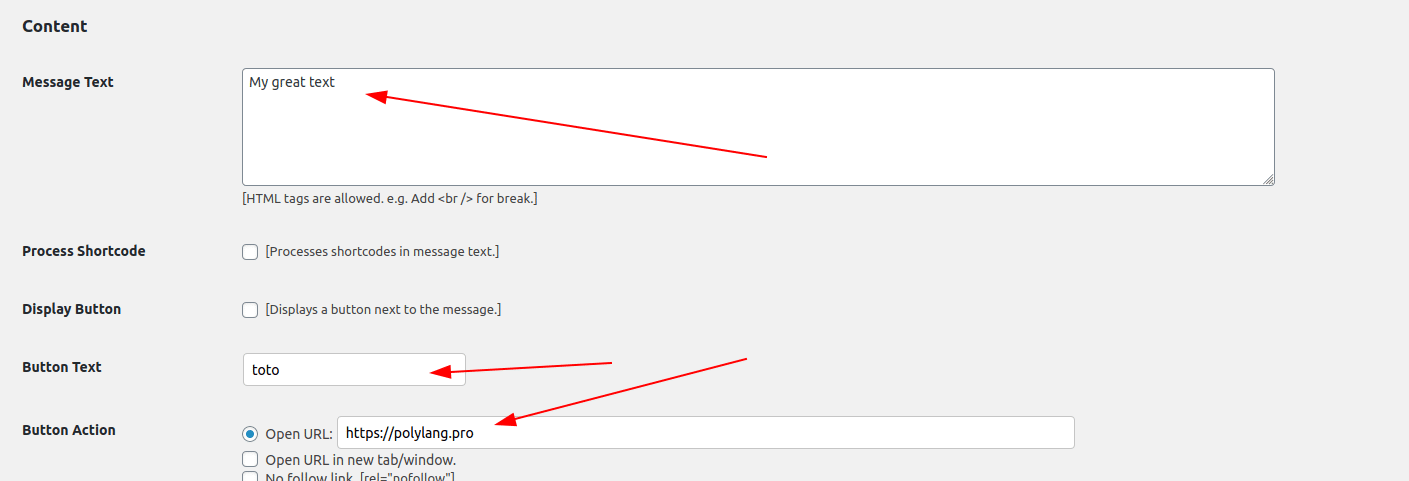
Here the goal is to translate “My great text”, “toto”, “https://polylang.pro”.
As in the previous chapter, we’ll search one of the string in the databases:

At this point, we can start to write (or edit an existing) wpml-config.xml:
<wpml-config>
    <admin-texts>
        <key name="wpfront-notification-bar-options">
        </key>
    </admin-texts>
</wpml-config>
Here the important information is the <key></key> syntax that is used for serialized options. Now, let’s unserialize “option_value”.
- Copy the “option_value” content
- Paste it in the field present on this URL https://www.unserialize.com/
- click on “Unserialize”
Here a screenshot of what you should have :
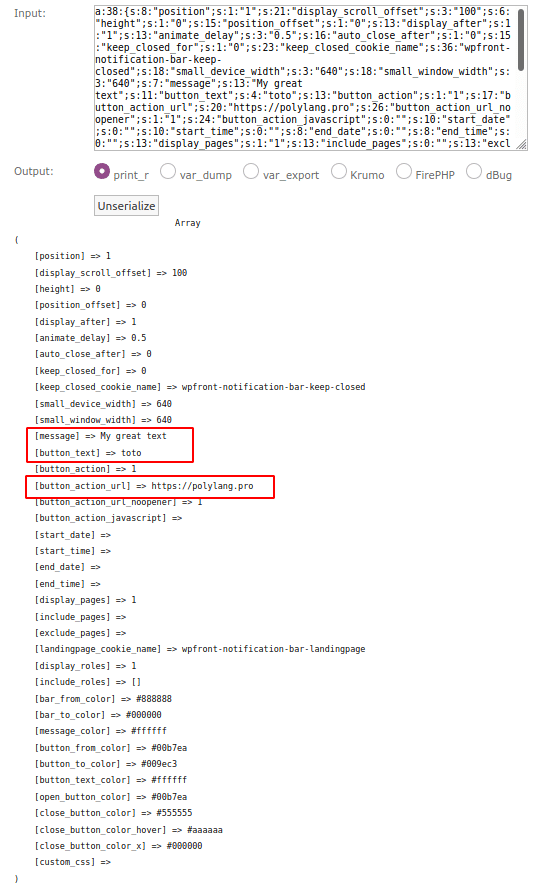
The information we need here are the option key:
- message
- button_text
- button_action_url
Which are sub-keys of our main option_name “wpfront-notification-bar-options”. Our wpml-config.xml should be modified as follow:
<wpml-config>
    <admin-texts>
        <key name="wpfront-notification-bar-options">
            <key name="message"/>
            <key name="button_text"/>
            <key name="button_action_url"/>
        </key>
    </admin-texts>
</wpml-config>
My wpml-config.xml is written, what should I do now ?
Simply upload it to your FTP in wp-content/polylang (you may need to create this folder)
Go to Polylang’s Strings Translations page and save your plugins settings again. You should now have a new group called “Polylang” in your strings translations with your new strings.
I already have a wpml-config.xml, may I merge two in one ?
Of course, be sure to copy the content inside the <wpml-config></wp-config> tags.
Let’s say you already have:
<wpml-config>
    <custom-types>
        <custom-type translate="1">et_pb_layout</custom-type>
    </custom-types>
</wpml-config>
and need to add the previous instructions, you can merge both wpml-config.xml like below:
<wpml-config>
    <custom-types>
        <custom-type translate="1">et_pb_layout</custom-type>
    </custom-types>
    <admin-texts>
        <key name="wpfront-notification-bar-options">
            <key name="message"/>
            <key name="button_text"/>
            <key name="button_action_url"/>
        </key>
    </admin-texts>
</wpml-config>