The compatibility with ACF Pro is provided by Polylang Pro. This integration is available only for post types and taxonomies. It does not work yet for options pages and ACF blocks (this is planned for a future version). There is however an integration to work with option pages contributed by the Be API Agency to achieve that, see: https://wordpress.org/plugins/acf-options-for-polylang/.
- Before you start
- Translating Fields Groups
- Translating fields values
- How to adjust the behavior of Layout Fields?
- The WPML configuration file
1. Before you start
The first question to ask yourself is: “Do I need to translate the label and the instructions?”
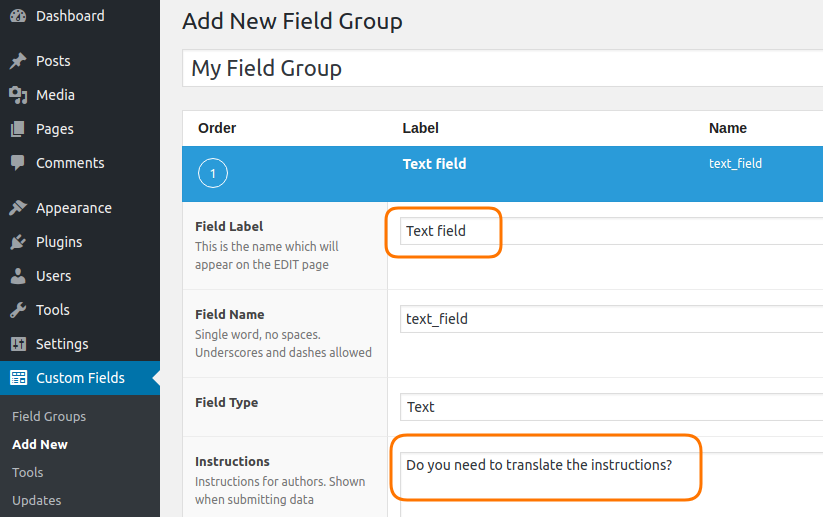
If yes, thus you need to translate your field groups in all your languages, you should read 2. Translating Fields Groups (see below). If not, it is preferable not to translate your field groups, you can skip to 3. Translating the fields values.
2. Translating Fields Groups
2.1 Activate the Field Groups translation
Go to Languages > Settings > Custom post types and Taxonomies and activate the translation as shown here:
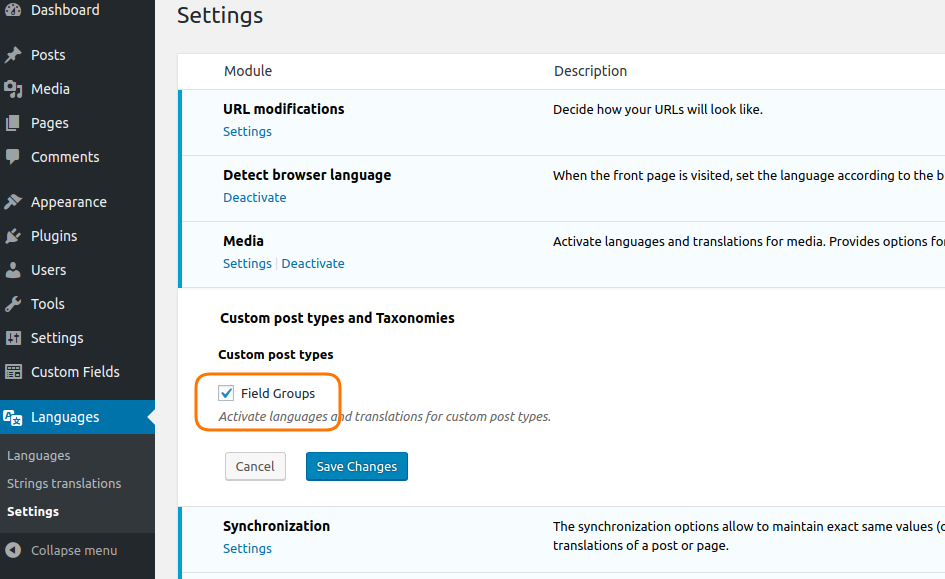
2.2 Translate a Field Group
Go to Custom Fields > Field Groups.
As you see in the following screenshot, the field groups are now translatable. Before translating your field groups you need to activate the duplicate tool as below, it will allow you to copy all the content from the source field group to the translation.
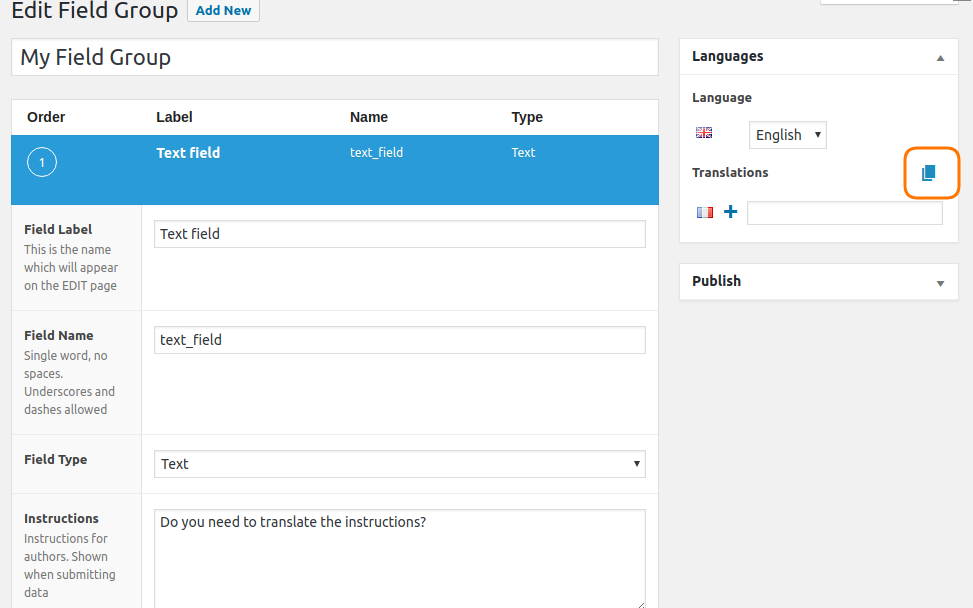
We recommend you to create entirely your field group with the wanted custom fields before translating it. Indeed there is no synchronization between the translated field groups. It means that a modification made for example in the English field group won’t impact its French translation.
Once you have duplicated your field group into another language, you just need to edit new field group to translate the label and the instructions.
Important note: You must not modify the field name value across your translations. You must keep the same value.
3. Translating fields values
3.1 Customize ACF Pro fields behavior
Since Polylang Pro 2.7, you have the ability to fine tune how your ACF Pro fields will behave when you create new translations for your posts (and pages, and custom post types…). This happens directly in ACF Pro’s Custom Fields sub-menu (see picture below).
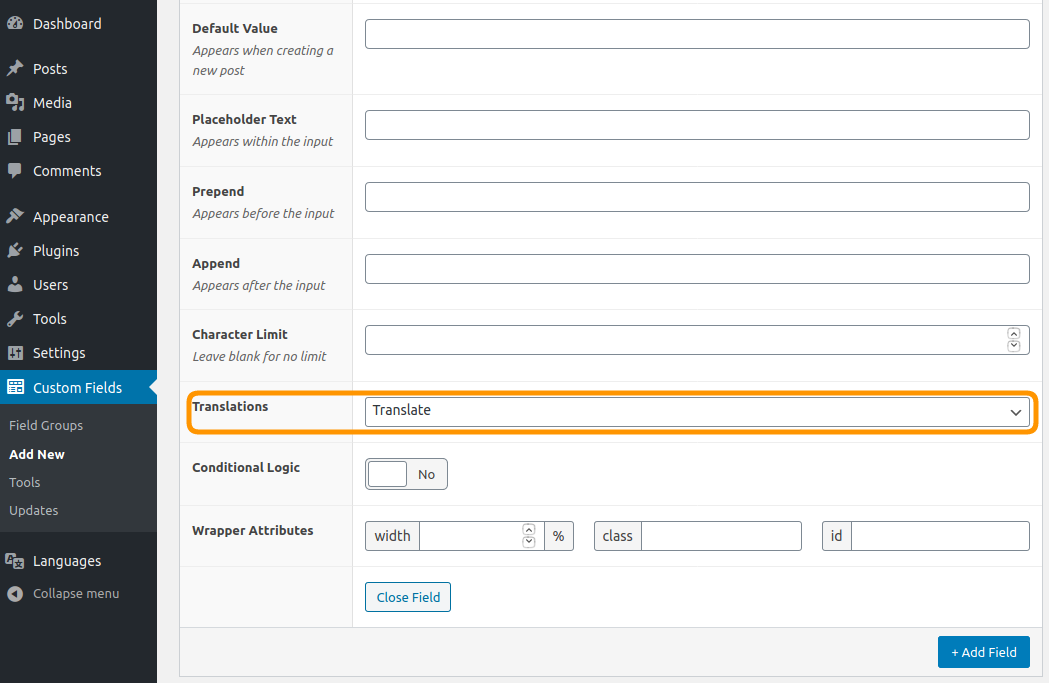
There are four options:
3.1.1 Ignore
When creating a new translation, each custom field for which you have selected the ‘ignore’ option will be left blank in the newly created translation.
3.1.2 Copy once
When translating a content (post, page, taxonomy …) in another language, Polylang decides which custom fields must be copied and which ones must be automatically ‘translated’. The custom fields that will be translated are:
- image
- file
- gallery
- post object
- relationship
- page link
- taxonomy.
It means that Polylang prefills the field with the correct value when creating new translations. For example, if an ‘image’ custom fields is translated, Polylang will try to find the translation of the linked image, if it exists. This also works when these custom fields are included in repeater fields. If the translation doesn’t exist, Polylang will keep the value as is.
3.1.3 Translate
This is very similar to ‘copy once’, although these fields are expected to be translated after the translation has been created. We suggests that you choose this option for each custom field you intent on translating yourself, or through a translation service (whether manual or automatic).
This option is only available for the following fields:
- Text
- Text area
- WYSIWYG editor
- oembed
- URL
3.1.4 Synchronize
As a reminder, ‘synchronization’ means that a modification made in a content impacts all its translations. So after creation of a translation, and when the post (or page, or taxonomy, etc.) is modified the custom fields marked for ‘synchronize’ will then behave differently given of the kind of value you want to modify.
3.1.4.1 With translated values
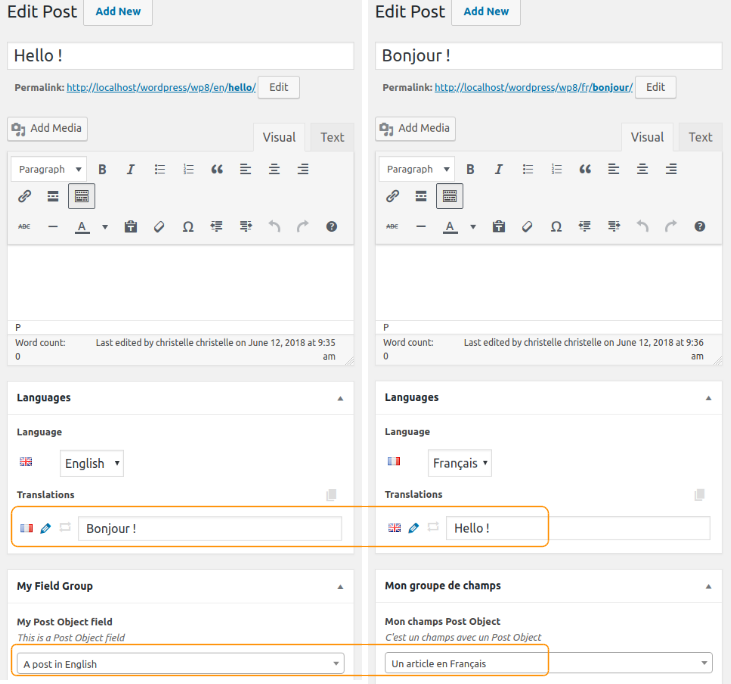
If you decide to modify a translated value from a synchronized custom field, Polylang will automatically synchronize the custom field of all the other translations. In the example below we set the English value of a post object field to “A post in English”. As you can see in the following screenshot its translated French value “Un article en Français” is automatically copied to the translated French post.
3.1.4.2 With a copied value
If you modify a copied value (text, number, email, url custom field …) in a synchronized custom field, Polylang will automatically keep this same value in the translated English post.
A modification made on the layouts (group, repeater, flexible content) will impact the translations. For example, if you choose to add a flexible content in a French post, Polylang will automatically add this flexible content to the translated English post. It’s the same behavior if you decide to remove it.
Note: These options are not available for ‘Layout’ type of custom fields, but each sub-field can be customized on its own.
Important Note: Even if you have selected the custom fields synchronization option in Languages > Settings > Synchronization (see section Custom fields outside of ACF Pro ), the options you select for each ACF Pro custom field will override this synchronization.
4. How to adjust the behavior of Layout Fields?
The ‘Layout’ type custom fields don’t provide the same range of options as other ACF fields. This is why we couldn’t include our own ‘Translations’ option at the Layout field level. However, we still have the ability to choose if adding or removing an element from the Layout field will affect all translations of our post, page, etc.
This means we can decide if changes to the structure of our Layout field should be reflected across all translations of our post or page, or if they should remain independent.
But how can we achieve this? We will explain this in the following section.
4.1 Use the sub-fields to adjust the behavior of Layout Fields
4.1.1 I want to synchronize the structure of my Layout field
As a reminder, ‘synchronization’ means that a modification made in a content (post, page, etc.) impacts all of its translations.
To achieve synchronization of your Layout Field structure, it’s essential to understand how child field settings play a crucial role. By setting the ‘Translations’ value of at least one child field to either ‘Translate’ or ‘Synchronize’, you can initiate the synchronization process. Please note that only one such setting is required to activate the synchronization.
4.1.2 I want to keep the structure of my Layout field unsynchronized
If you prefer to keep the structure of your Layout Field unsynchronized across the translated posts, pages, etc., you need to be sure that the translation value of all your child fields is set to “Ignore” or “Copy Once”.
Remember that if one and only one child field is set to “Translate” or “Synchronize”, it will activate the synchronization. So make sure that none of your child fields are set to “Translate” or “Synchronize”.
Once done, changes made to one language version won’t automatically affect the others. This method allows to get a different structure for each language.
5. The WPML configuration file
Alternatively, you can configure the way each custom fields behave when a content is translated by writing a wpml-config.xml file. Each custom field you add to this configuration file will override the behavior selected in the Custom Fields sub-menu. Also the wpml-config.xml applies to every custom fields from every plug-in, as well as those you added manually. See our documentation: The wpml-config.xml file
 Polylang